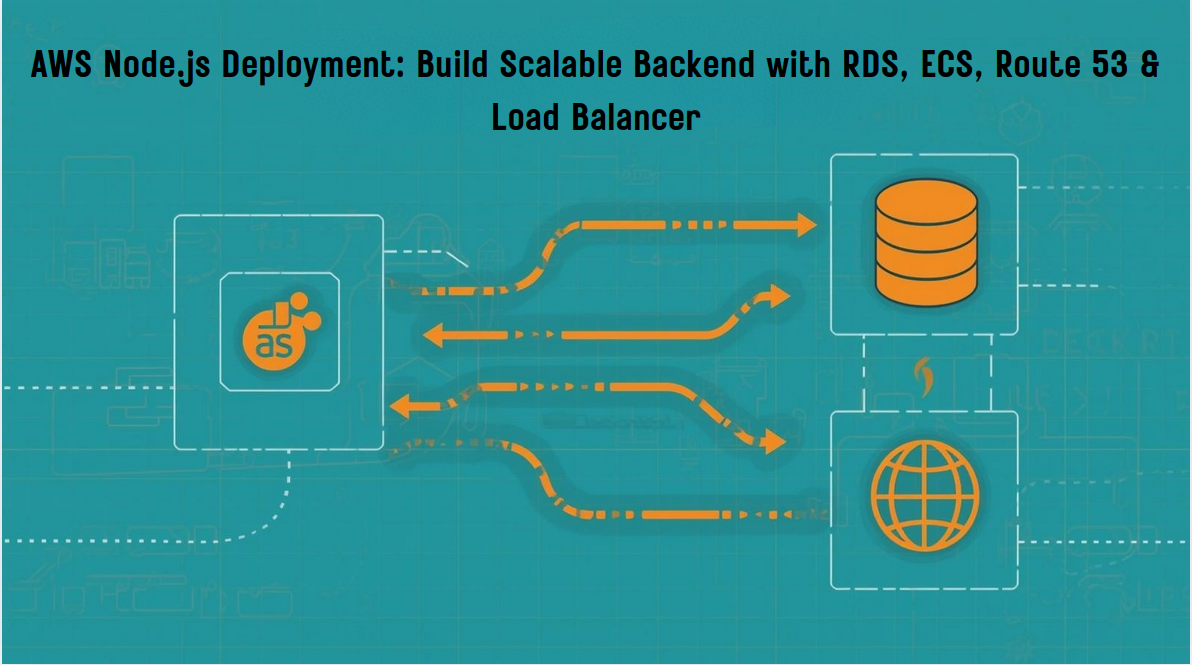
How to Deploy a Node.js App on AWS with ECS, RDS & Load Balancer (Step-by-Step)
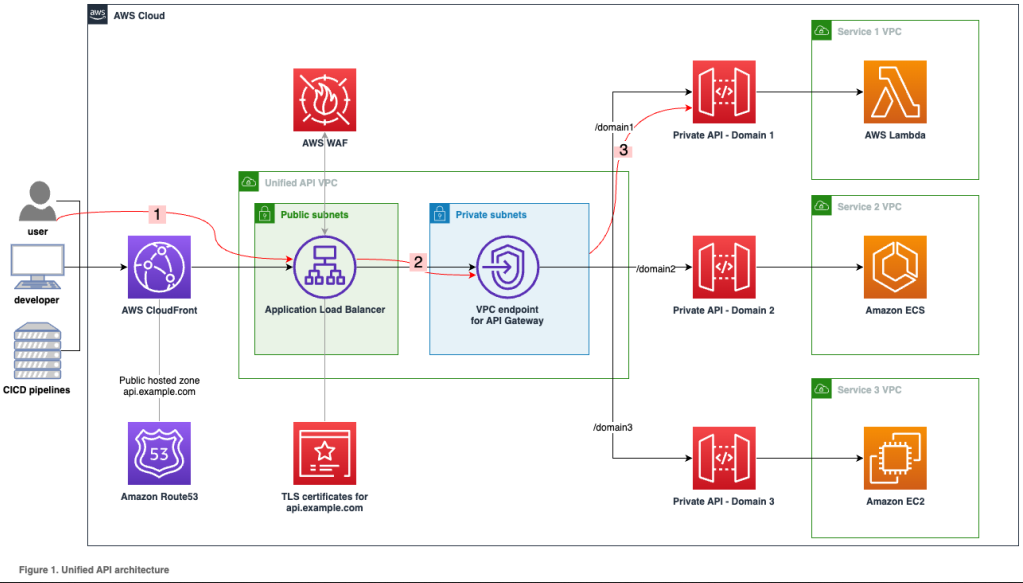
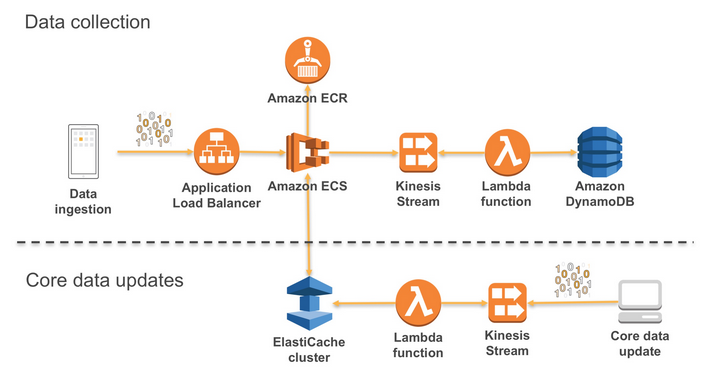
Deploying a Node.js application to production isn’t just about pushing code — it’s about creating a secure, scalable, and maintainable backend. With Amazon Web Services (AWS), you can combine container orchestration, managed databases, load balancing, and domain routing to build a professional-grade environment. In this guide, we’ll walk through how to deploy a Node.js app on AWS using services like ECS (Elastic Container Service) for containers, RDS (Relational Database Service) for database management, Application Load Balancer (ALB) for traffic distribution, and Route 53 for DNS. By following these steps, you’ll learn industry best practices for deploying Node.js applications in the cloud — from containerization to scaling and monitoring — so your backend is production-ready from day one. Before diving into implementation, let’s understand how these components work together to form a complete system. Our AWS backend architecture consists of four main components: When a user makes a request to your application: Architecture Advantages: Before starting the AWS Node.js deployment process, ensure you have: Note: All commands in this tutorial assume you’re using a Linux or macOS terminal. Windows users may need to adjust commands slightly or use WSL (Windows Subsystem for Linux). The first component of our architecture is the database. The AWS RDS setup process creates a managed database instance that your application will connect to. Configure your database with these recommended settings: Important: Store your master username and password securely! You’ll need these credentials to configure your application’s database connection. The AWS RDS setup process takes several minutes to complete. While waiting, you can proceed with the next steps. For your database to be accessible from your ECS containers but protected from the public internet: Pro Tip: During the AWS RDS setup, note the endpoint URL – you’ll need this to configure your Node.js application. The Node.js Docker AWS workflow begins with creating a proper Dockerfile to package your application. This ensures consistent deployment across environments. Create a Dockerfile in your project root with the following content: Before pushing to AWS, test your container locally: Using Node.js Docker AWS integration simplifies the deployment and scaling process. Once your container runs successfully locally, you’re ready to push it to Amazon ECR. Create a repository in Amazon ECR: Authenticate Docker with ECR: Tag and push your image: With your database and container image ready, it’s time to set up AWS ECS Node.js orchestration to run your application. The AWS ECS Node.js task definition specifies how your container should run: Now create a service to run your task: An effective AWS ECS Node.js setup ensures your application can scale automatically as demand changes. The AWS Load Balancer configuration distributes traffic across multiple ECS tasks, providing high availability and fault tolerance. Create a security group for your load balancer: Create a target group: Pro Tip: A proper AWS Load Balancer configuration includes health checks and target group settings to ensure traffic is only sent to healthy instances. Now return to your ECS service and update it to use the load balancer: The final step is connecting your application to a custom domain using Route 53. If you haven’t already: The Route 53 domain setup connects your custom domain to the Application Load Balancer: Complete the Route 53 domain setup by creating an A record that points to your load balancer. You may also want to create a www subdomain record that points to the same load balancer. DNS changes can take time to propagate. Verify your setup using: You should see your load balancer’s IP addresses in the response. After completing all steps, it’s time to verify your AWS Node.js deployment: Set up monitoring for your deployment: Configure CloudWatch alarms for: Set up log monitoring: Verify your security configuration: An AWS Node.js deployment is a production setup where a Node.js app runs on Amazon Web Services using ECS for containers, RDS for the database, Route 53 for DNS, and an Application Load Balancer for traffic distribution. Amazon ECS simplifies running Dockerized Node.js services, enabling autoscaling, health checks, zero-downtime updates, and integration with Load Balancer, RDS, and CloudWatch. Amazon RDS provides a managed database for Node.js apps, handling backups, monitoring, and Multi-AZ high availability, keeping deployments reliable and scalable. The ALB routes requests to healthy ECS tasks running the Node.js service, ensuring scalability, performance, and fault tolerance. Route 53 maps your custom domain to the Load Balancer, providing fast DNS resolution and routing traffic to your Node.js application on AWS. Use ECS Service Auto Scaling for containers, adjust ALB thresholds, and scale RDS vertically or with read replicas depending on your workload. Provision an SSL/TLS certificate in AWS Certificate Manager and attach it to your ALB’s HTTPS listener. Redirect HTTP to HTTPS for secure traffic. Keep RDS private, restrict access with security groups, use IAM roles with least privilege, store secrets in AWS Parameter Store or Secrets Manager, and enforce HTTPS at the Load Balancer. You’ve now seen how to deploy a Node.js backend on AWS using ECS, RDS, Load Balancer, and Route 53 to create a robust cloud architecture. This setup ensures your application is scalable, reliable, and secure, with the flexibility to grow as traffic increases. To take your deployment further: Automate releases with CI/CD pipelines (CodePipeline, GitHub Actions). Implement detailed monitoring in CloudWatch. Optimize costs by right-sizing ECS tasks and RDS instances. Secure your environment with best practices like private databases, IAM least privilege, and HTTPS. Whether you’re migrating an existing app or launching something new, running a Node.js application on AWS offers the performance and resilience modern businesses need. Start small, scale with demand, and continuously optimize — your backend will be ready for real-world workloads. Note: This blog post provides a general guide for deploying Node.js applications on AWS. Your specific requirements may vary, so adjust the configurations accordingly. Always follow AWS security best practices and keep your services updated. Transform Your Business With Cloud Excellence 🚀 Schedule a session with our experts to discuss your cloud solutions. Introduction: Building Production-Ready Backend Systems

Understanding the Architecture
Prerequisites
Step 1: AWS RDS Setup for Your Node.js Application
Creating the RDS Instance
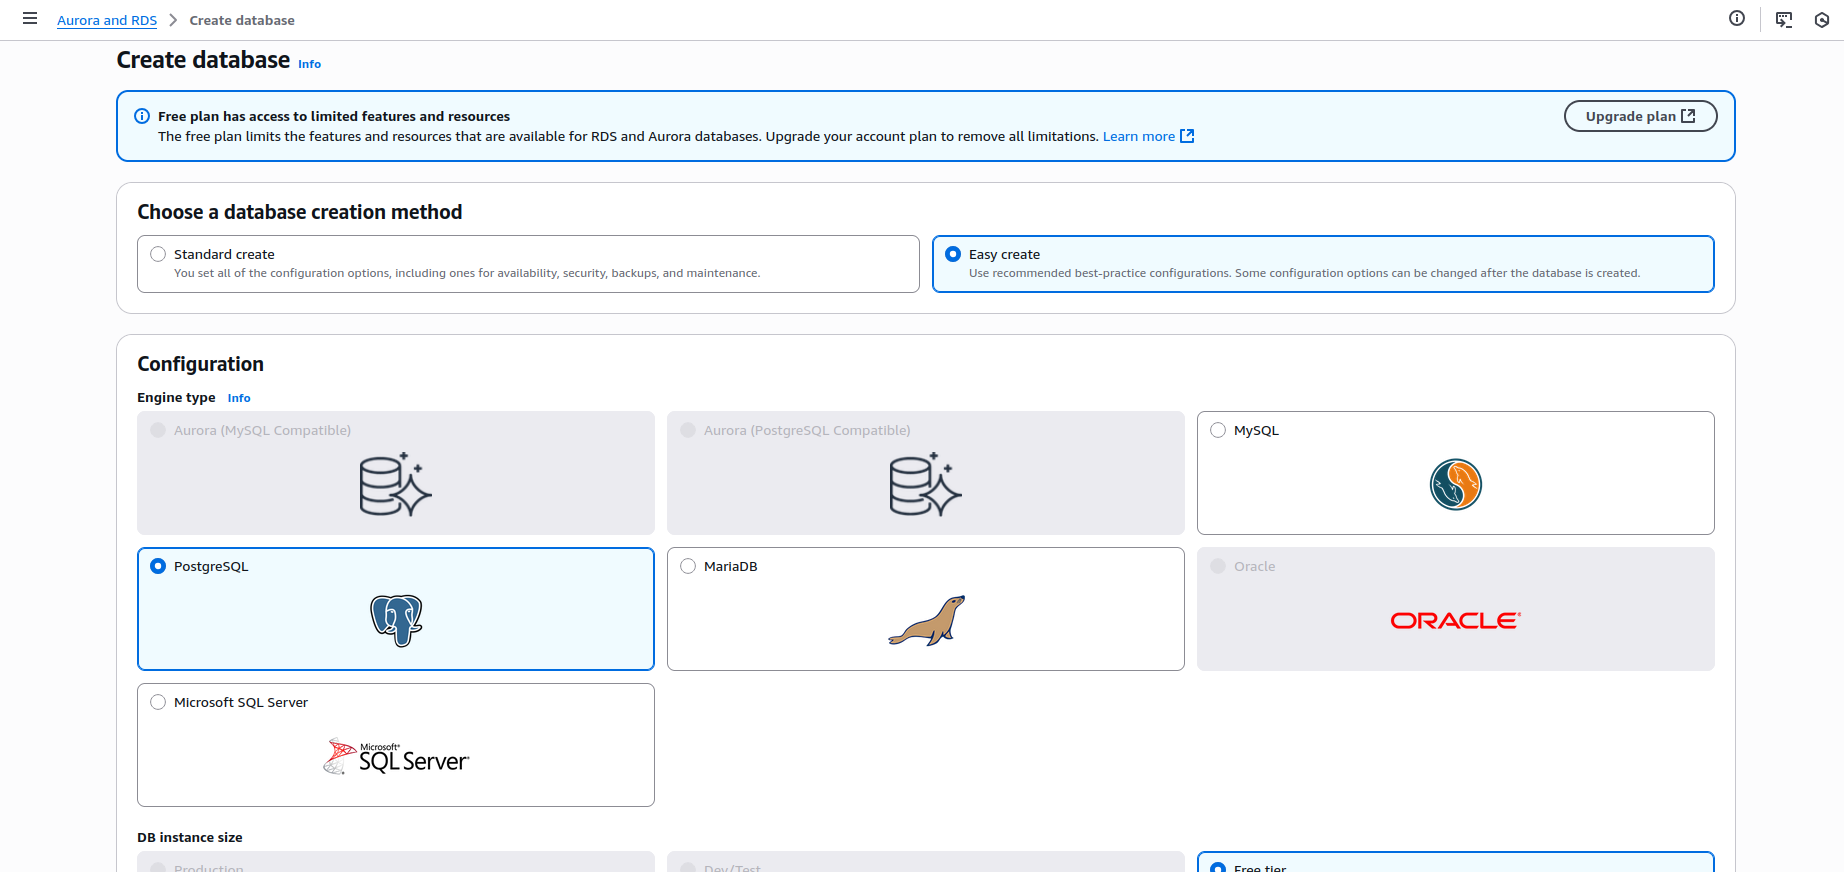
Configuration Settings
Configuring Security Groups
{
  "Type": "AWS::EC2::SecurityGroup",
  "Properties": {
    "GroupDescription": "RDS Security Group",
    "VpcId": {"Ref": "VPC"},
    "SecurityGroupIngress": [
      {
        "IpProtocol": "tcp",
        "FromPort": 3306,
        "ToPort": 3306,
        "SourceSecurityGroupId": {"Ref": "ECSSecurityGroup"}
      }
    ]
  }
}Step 2: Containerize Your Node.js Application
Creating an Optimized Dockerfile
# Use the official Node.js 16 image as base
FROM node:16-alpine

# Set working directory
WORKDIR /usr/src/app

# Copy package files and install dependencies
COPY package*.json ./
RUN npm ci --only=production

# Copy application code
COPY . .

# Set environment variables
ENV NODE_ENV=production
ENV PORT=3000

# Expose the port your app runs on
EXPOSE 3000

# Start the application
CMD ["node", "app.js"]
Building and Testing Locally
# Build the Docker image
docker build -t nodejs-app .

# Run the container locally
docker run -p 3000:3000 -d nodejs-app

# Test the application
curl http://localhost:3000Pushing to Amazon ECR
aws ecr create-repository --repository-name nodejs-appaws ecr get-login-password --region us-east-1 | docker login --username AWS --password-stdin <your-account-id>.dkr.ecr.us-east-1.amazonaws.comdocker tag nodejs-app:latest <your-account-id>.dkr.ecr.us-east-1.amazonaws.com/nodejs-app:latest
docker push <your-account-id>.dkr.ecr.us-east-1.amazonaws.com/nodejs-app:latest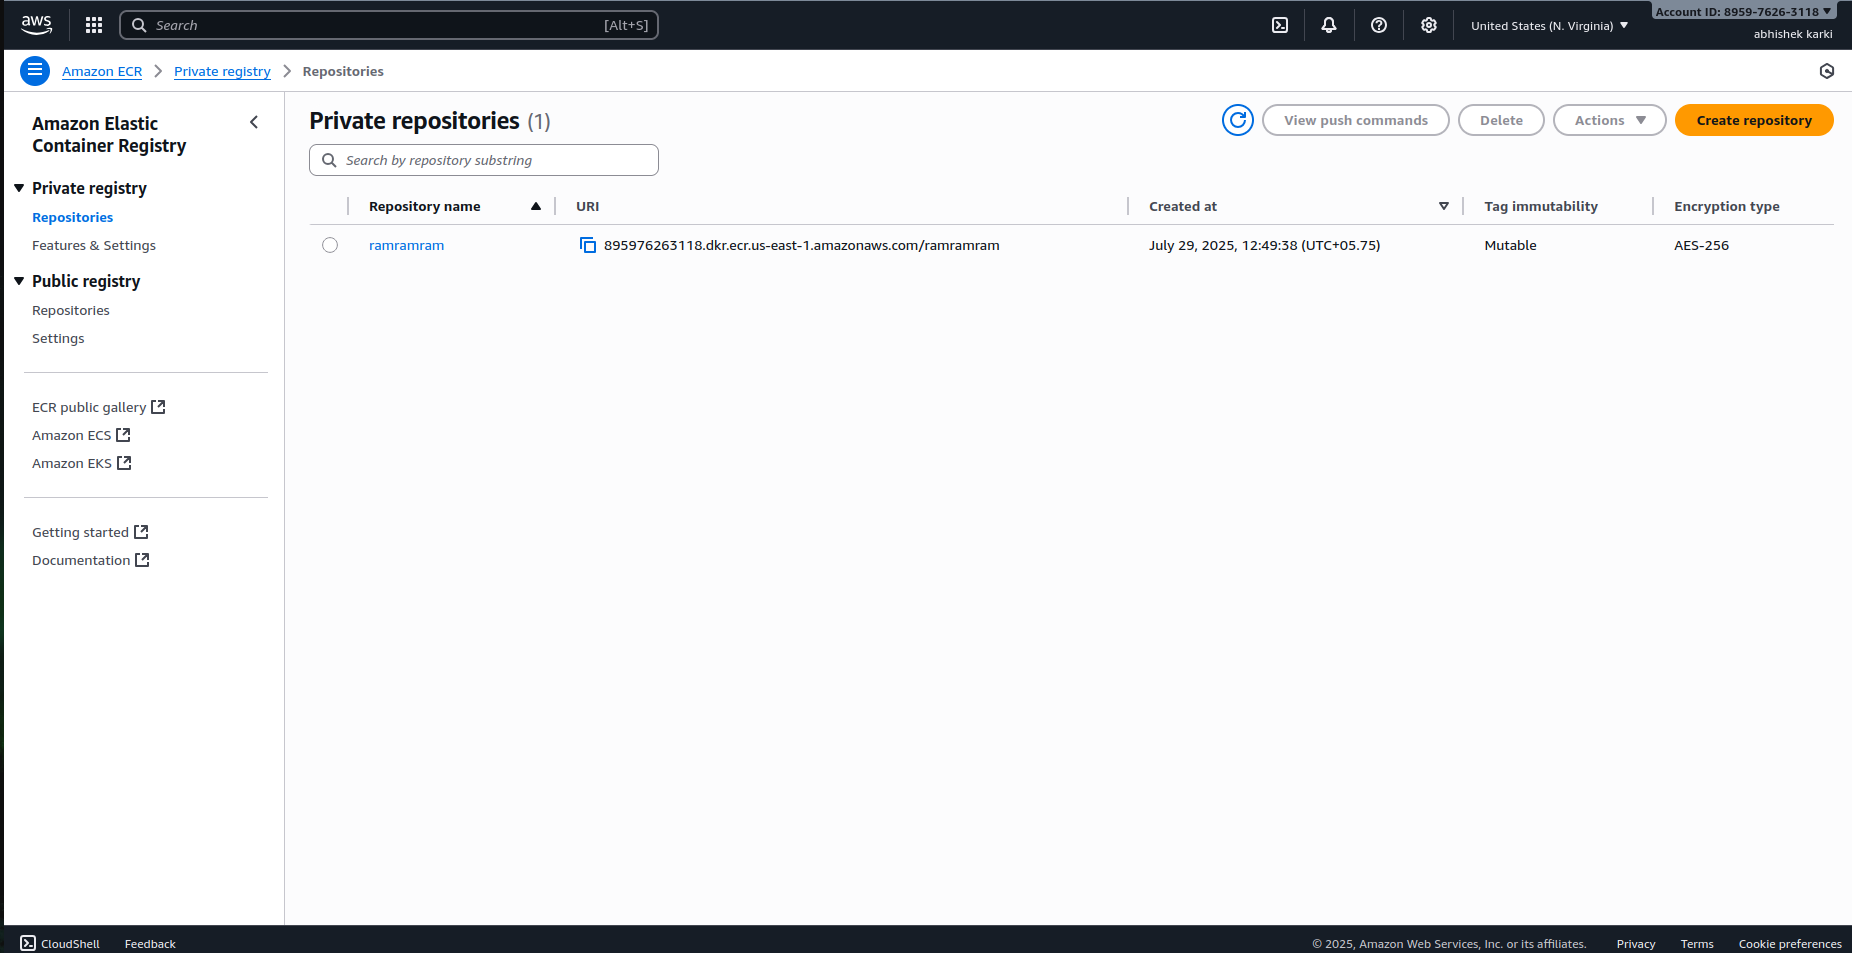
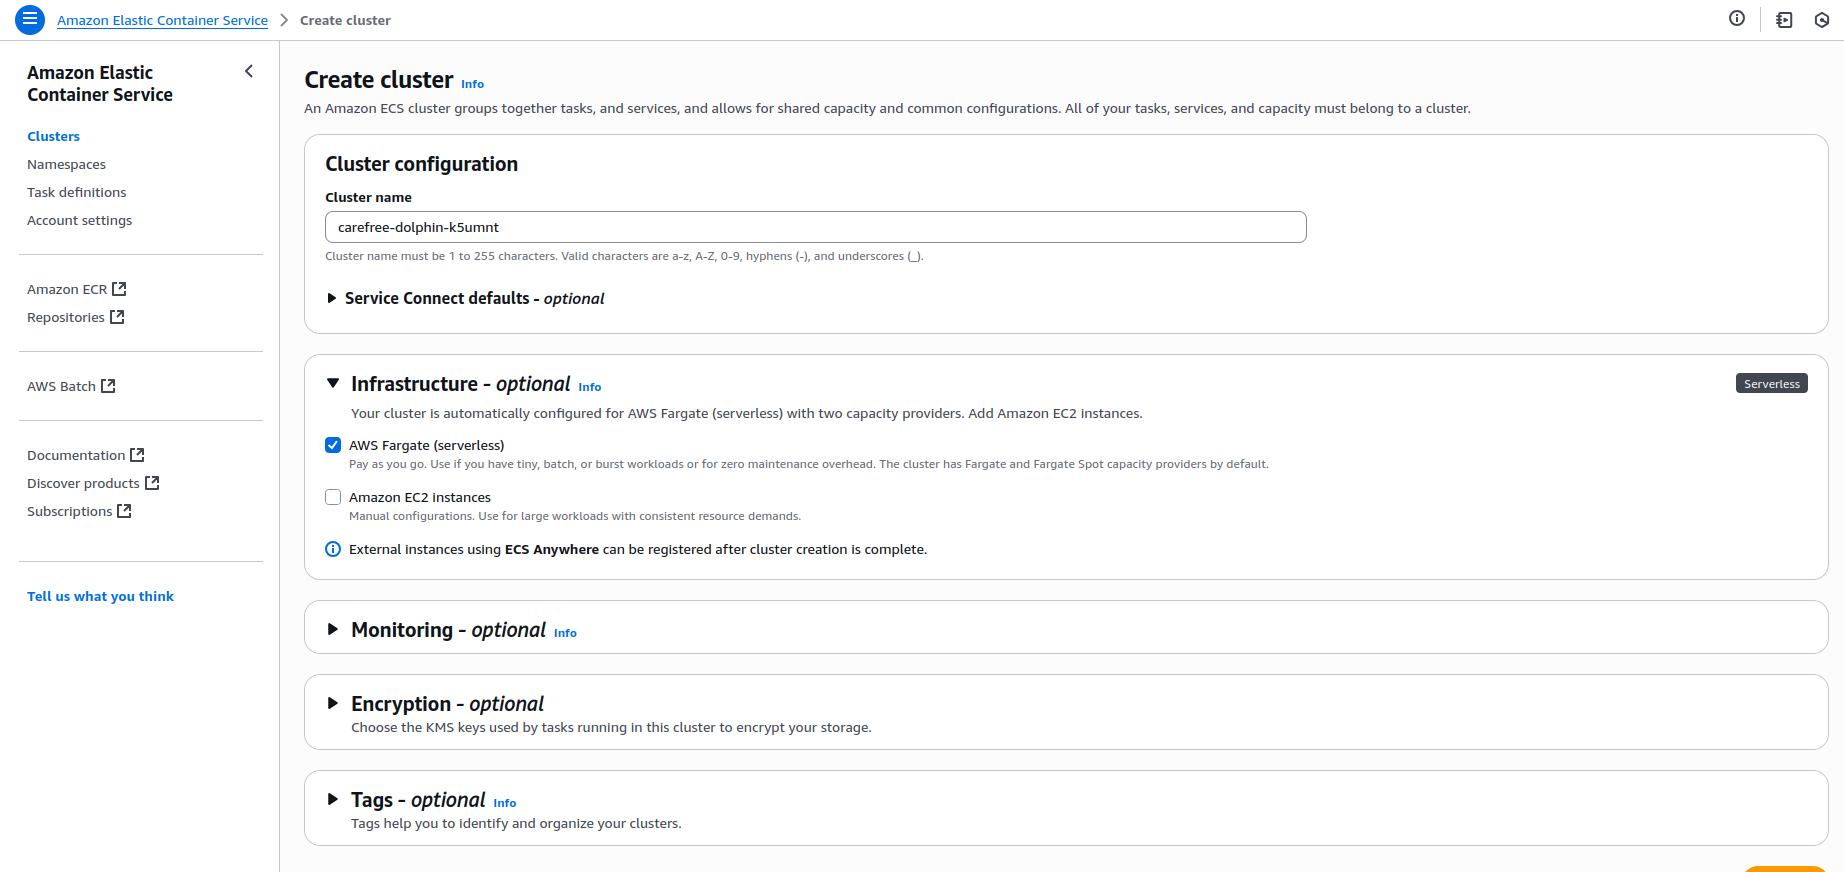
Amazon ECR repository with successfully pushed Node.js containerStep 3: Setting Up ECS for Container Orchestration
Creating an ECS Cluster
Creating a Task Definition
{
  "name": "nodejs-app",
  "image": "<your-account-id>.dkr.ecr.us-east-1.amazonaws.com/nodejs-app:latest",
  "essential": true,
  "portMappings": [
    {
      "containerPort": 3000,
      "hostPort": 3000,
      "protocol": "tcp"
    }
  ],
  "environment": [
    {
      "name": "DB_HOST",
      "value": "your-rds-endpoint.rds.amazonaws.com"
    },
    {
      "name": "DB_USER",
      "value": "admin"
    }
  ],
  "secrets": [
    {
      "name": "DB_PASSWORD",
      "valueFrom": "arn:aws:ssm:region:account-id:parameter/db/password"
    }
  ],
  "logConfiguration": {
    "logDriver": "awslogs",
    "options": {
      "awslogs-group": "/ecs/nodejs-app",
      "awslogs-region": "us-east-1",
      "awslogs-stream-prefix": "ecs"
    }
  }
}
Creating an ECS Service
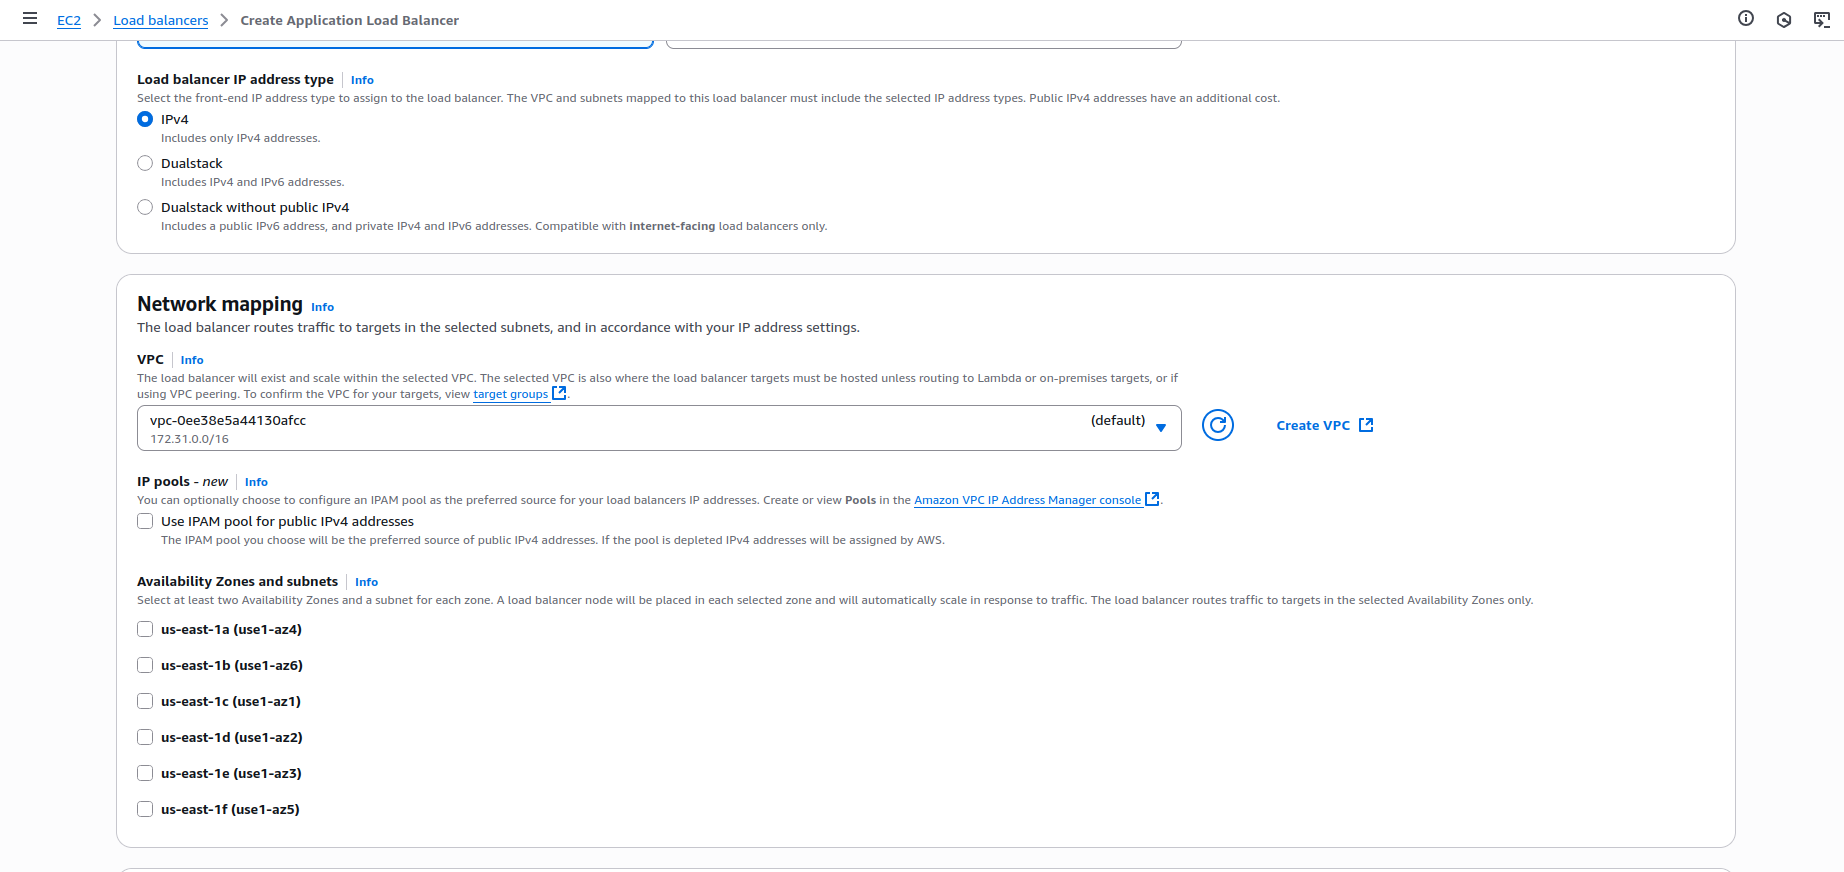
Step 4: AWS Load Balancer Configuration
Creating an Application Load Balancer
Configuring Security Groups
Setting Up Target Groups
Updating the ECS Service
Step 5: Route 53 Domain Setup
Creating a Hosted Zone
Configuring DNS Records

Verifying DNS Configuration
dig yourdomain.comTesting and Validation
Deployment Verification
Monitoring and Logging
Security Verification
FAQ
1) What is an AWS Node.js deployment?
2) Why use ECS for a Node.js application?
3) How does Amazon RDS fit into the architecture?
4) What does the Application Load Balancer do?
5) How does Route 53 help?
6) How do I scale a production AWS Node.js deployment?
7) How do I enable HTTPS?
8) What are key security best practices?
Bringing It All Together: Node.js on AWS
References & Further Reading