Host Vite Frontend on AWS S3 and CloudFront with SSL and Custom Domain 2025(Step-by-Step Guide)
If you are looking for a quick, secure, and inexpensive method to host Vite frontend on AWS S3 AND Cloudfront , you are in the right place! In this step-by-step guide I will detail for you how to:
– Deploy a vite frontend on an AWS S3 bucket
– Serve it globally via AWS CloudFront
– Secure it with SSL/HTTPS
– Connect it to a custom domain using Route 53
With this set-up you will enjoy fast page loading times, global availability, and industry standard security using scalable AWS services.
Prerequisites
- A Vite frontend project (Node.js based)
- An AWS account with permissions for S3, CloudFront, Certificate Manager, and Route 53)
STEPS
1.Clone your project
git clone your-repo-url
cd your-project-folder
2.Building your vite project:
Go to your root directory of project and run the following command:
npm install
npm run build
In my case it was : npm vite build
This command generates optimized production files, typically in a dist folder in your project.
3. Setting Up an S3 Bucket:
Go to the S3 Console.
Click Create bucket.
Enter a unique bucket name (e.g., vite-frontend-bucket).
Choose a region close to your target audience.
Uncheck Block all public access, then confirm.
Click Create bucket.
4.Upload Your Files to your S3 bucket.
Click on your newly created bucket in the S3 Console.
- Go to the Objects tab and click Upload.
- Drag and drop the contents of the dist folder (not the folder itself) into the upload area.
- Click Upload.

5. Enable Static Website Hosting
- Go to the Properties tab of your bucket.
- Scroll down to the Static website hosting section.
- Click Edit and enable static website hosting.
- Set the Index document to index.html.
- Save the changes.
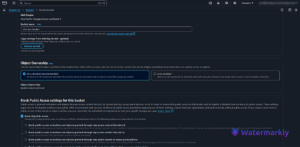
6. Configure Bucket Permissions
- Go to the Permissions tab of your bucket.
- Scroll to the Bucket policy section and click Edit.
- Add the following policy (replace
your-bucket-namewith your bucket’s name):
{
  "Version": "2012-10-17",
  "Statement": [
    {
      "Effect": "Allow",
      "Principal": "*",
      "Action": "s3:GetObject",
      "Resource": "arn:aws:s3:::your-bucket-name/*"
    }
  ]
}
Save Changes.
7. Test the S3 Static Website
- Go to the Properties tab and scroll down to the Static website hosting section.
- Copy the Endpoint URL and open it in your browser.

Your Vite project should load!
8. Set Up CloudFront for Your S3 Bucket
- Go to the CloudFront Console.
- Click Create Distribution.
- Under the Origin section:
- Select S3 bucket as the origin.
- Choose your bucket from the dropdown.
4.Set the Default cache behavior:
- Viewer Protocol Policy: Redirect HTTP to HTTPS.
5.Add an Alternate Domain Name (CNAME) if you plan to use a custom domain.
6. Click Create Distribution.
Restrict Bucket Access to CloudFront
- Go back to your S3 bucket and open the Permissions tab.
- Remove the public access permissions you set earlier.
- Add the CloudFront OAC to allow only CloudFront to access your bucket.
9.Get an SSL Certificate
- Go to the Certificate Manager service.
- Click Request a certificate.
- Choose Request a public certificate and click Next.
- Enter your domain name (e.g.,
www.example.com) and click Add another name to include the root domain (example.com). - Choose DNS validation and click Request.
Validate the Certificate
- Go to Route 53 and open the hosted zone for your domain.
- Add the DNS records provided by the Certificate Manager.
- Wait until the certificate status changes to Issued.
Or you can do it in the same page.
10. Link CloudFront with Your Domain
- Open your CloudFront distribution.
- Go to the General tab and click Edit.
- Add your domain name (e.g.,
www.example.com) in the Alternate Domain Names (CNAMEs) field. - Select the SSL certificate you created in the Custom SSL Certificate section.
- Save the changes.
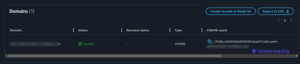
Update Route 53
- Go to Route 53 and open the hosted zone for your domain.
- Add an A Record:
- Record name:
www(or leave it blank for the root domain). - Alias: Yes.
- Target: Select your CloudFront distribution.
3. Save the record.
11: Test Your Setup
- Open your browser and navigate to your domain (e.g.,
- Verify that your Vite project loads correctly over HTTPS
12: Conclusion
Congratulations! You’ve successfully hosted your Vite frontend project on AWS S3, served it with CloudFront, secured it with an SSL certificate, and connected it to your custom domain using Route 53. With this setup, your site is fast, secure, and ready for global traffic.
With this setup, you’ve successfully learned how to host your Vite frontend on AWS S3 and CloudFront with full HTTPS support and a custom domain — a fast, secure, and scalable way to deploy modern web apps.
FAQ: Hosting Your Vite Frontend with AWS S3, CloudFront & Route 53
1. Why should I use AWS S3 and CloudFront to host my frontend?
Great question! S3 is a super reliable and affordable way to store static files like HTML, CSS, and JavaScript. Pair it with CloudFront, and your site gets delivered from servers all around the world, making it fast for users no matter where they are. Add in Route 53 for custom domains and SSL for security, and you’ve got a professional, secure setup that scales easily.
2. How do I update my site after it’s live?
It’s simple: just make your changes, then run npm run build to generate the latest version of your site. Upload the new files from your dist folder to your S3 bucket. If you’re using CloudFront, don’t forget to invalidate the cache so visitors can see the latest version immediately.
3. What’s the difference between using the S3 website link and CloudFront?
The S3 website URL works fine, but it doesn’t support HTTPS by itself—which is a deal breaker these days. CloudFront not only brings HTTPS support (via SSL certificates), but it also speeds up your site with caching and global delivery.
4. How can I get HTTPS (SSL) working with my custom domain?
AWS has a free tool called Certificate Manager. Just request a certificate for your domain, verify it using Route 53 DNS records, and then attach that certificate to your CloudFront distribution. Once that’s done, your site will be secure with HTTPS.
5. How long does it take for DNS changes to show up?
Usually just a few minutes, but it can sometimes take up to 48 hours to fully update across the internet. If it’s not showing right away, give it a bit of time and try clearing your browser cache.
6. I’m seeing errors when I load my site. What should I check?
Here’s a quick checklist:
-
Did you invalidate the CloudFront cache after updating?
-
Are your S3 permissions set correctly for CloudFront to access your files?
-
Is your
index.htmlfile uploaded and named correctly? -
Are your DNS records in Route 53 pointing to the right place?
-
Is your SSL certificate properly attached in CloudFront?
Go through those steps, and most issues can be sorted out pretty quickly.
Need a Hand?
Setting this all up can take time and attention to detail. If you’re looking for a partner to manage AWS deployments or streamline DevOps, Cloudlaya is here to help.
Yoy May Find these Blog Useful.
7 Powerful AWS NOVA Gen AI Tools That Make AI Work For You (No Coding Required!)
AWS PartyRock: Showcasing the Creativity of Artificial Intelligence
Delivering High-Performance OTT Streaming with Amazon CloudFront
One thought on “Host Vite Frontend on AWS S3 and CloudFront with SSL and Custom Domain 2025(Step-by-Step Guide)”