How to Migrate AWS S3 Bucket ?
Customers often need to transfer data from one bucket to another for the sake of backup or the business need. Using the DataSync service from AWS makes it possible to migrate AWS S3 bucket contents from one to another bucket within the same account, within a different region(in the same account), and a different AWS account.
Transferring data from one bucket to another might sound overwhelming, there is a good chance that you might be charged heavily while transferring the data. Data within the S3 bucket in AWS is now possible with the scheduled transfer minimizing the overhead costs.
Table of Contents
Migrate AWS S3 Bucket Within the Same Account
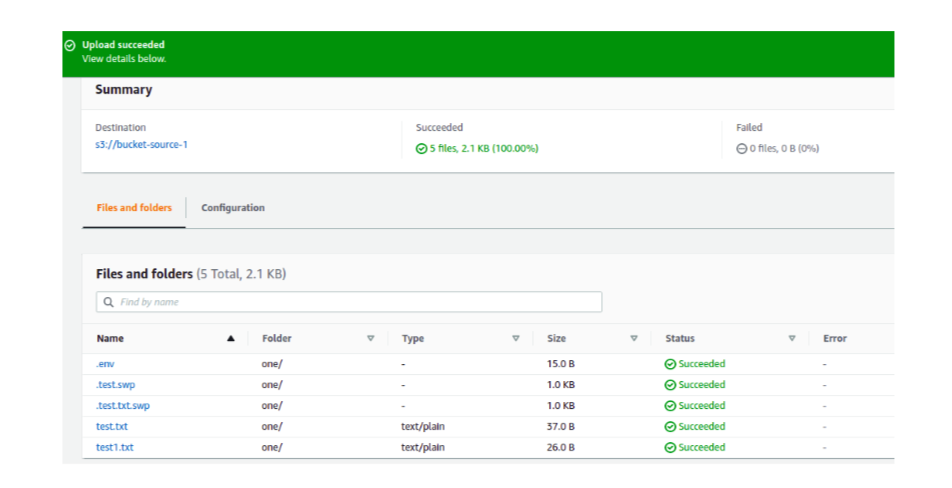
For the sake of data transfer, create a demo bucket and name them uniquely. On the source bucket, add some files and folders. Now we are interested in transferring those contents to the destination S3 bucket.
Step 1: Configuring source location
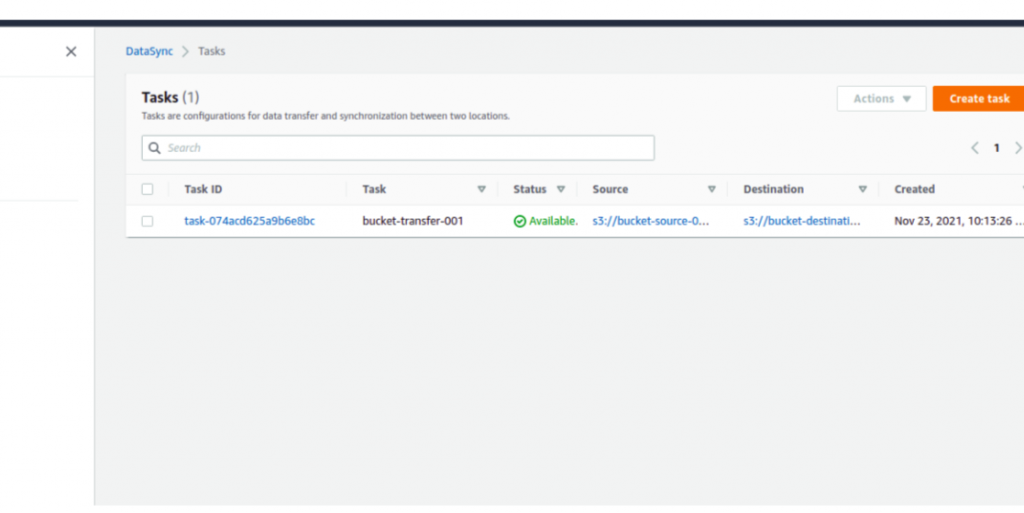
Log in to the AWS Management Console, navigate to the DataSync service, select Tasks on the left menu bar, then choose to Create task.
Here, configure the source location. You can either create a new location or choose an existing location. On the location type, select Amazon S3. Consider that, the region you are transferring the data should match the source and destination of the existing bucket.
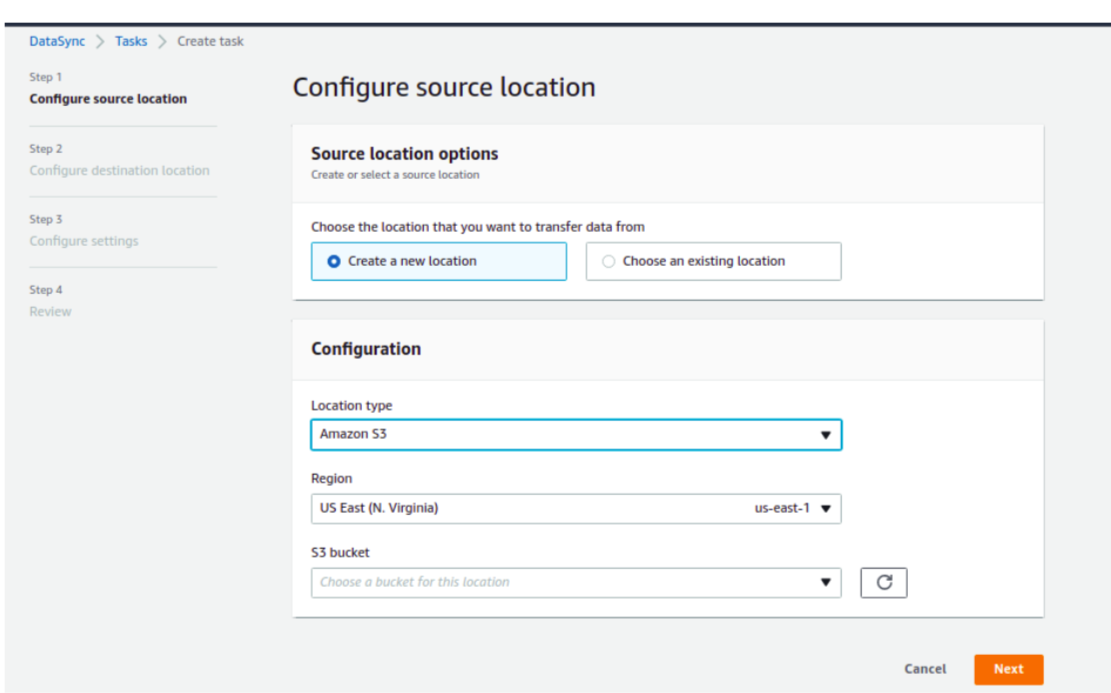
After you select your Region, S3 bucket, S3 storage class, and Folder select the Auto Generate button for the IAM role.
Once done, confirm the source of the bucket.
Step 2: Configuring Destination location
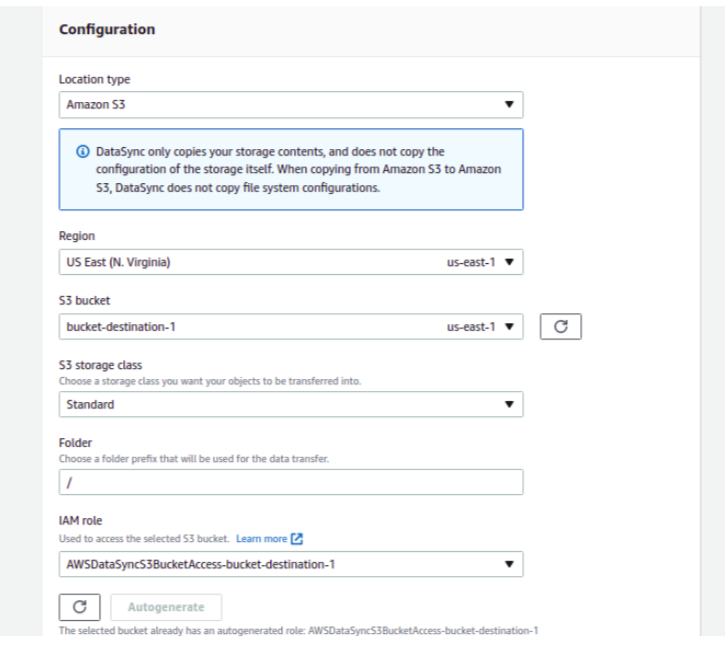
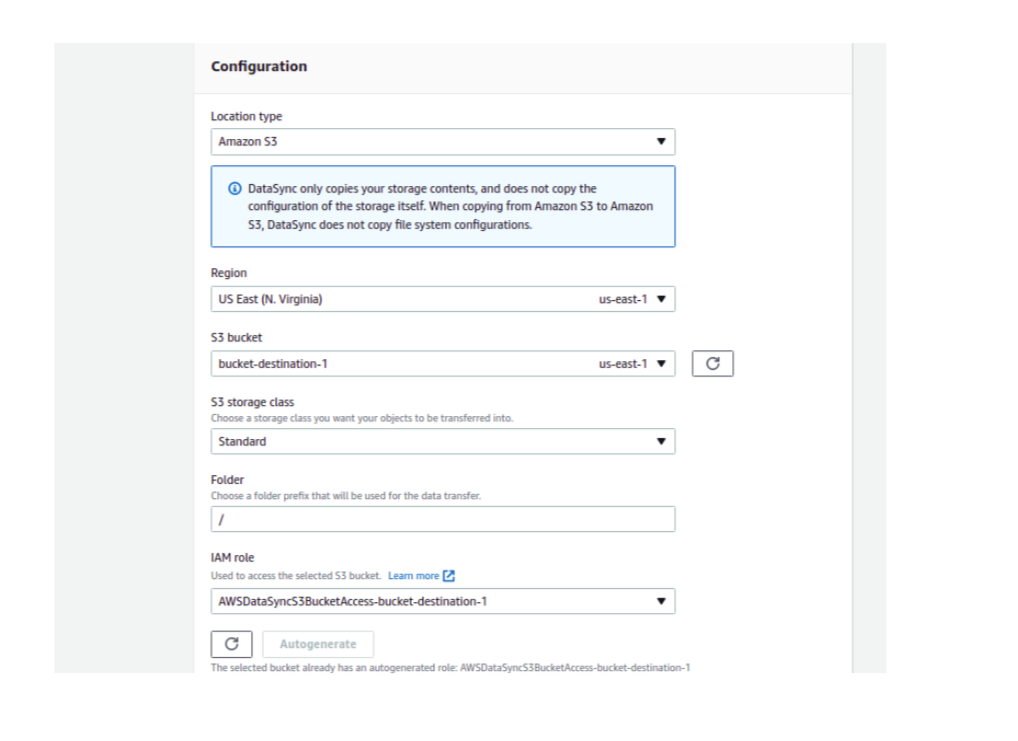
For the destination location, select Create a new location, and from the Location type dropdown select Amazon S3. The configuration for the destination is fairly similar to the source configuration, however, you need to choose the destination bucket name in the S3 Bucket section.
After you select your Region, S3 bucket, S3 storage class, and Folder select the Auto Generate button for the IAM role for the destination bucket.
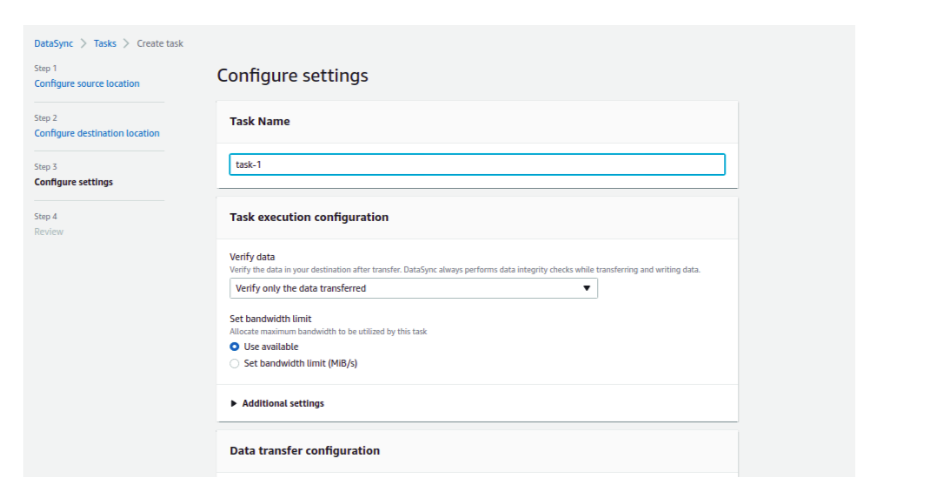
Step 3: Configure Settings
Upon configuring the settings for the task, provide the proper task name. Here, it’s advised to choose to transfer data with the available bandwidth. Let Data to Scan be set to default.
On the schedule section, you can set the frequency where the data is partitioned and transferred on a weekly, daily, or hourly basis. If you have huge data to transfer, you can use the scheduling for the sake of managing operational and infrastructure overhead costs.
If you are interested to see the logs of the task, you can Auto-Generate the cloud watch log group at the button of the configuration setting.
On the next page, you are asked to review the transfer, verify the task and Create Task. Now the task has been successfully created and is ready to launch.
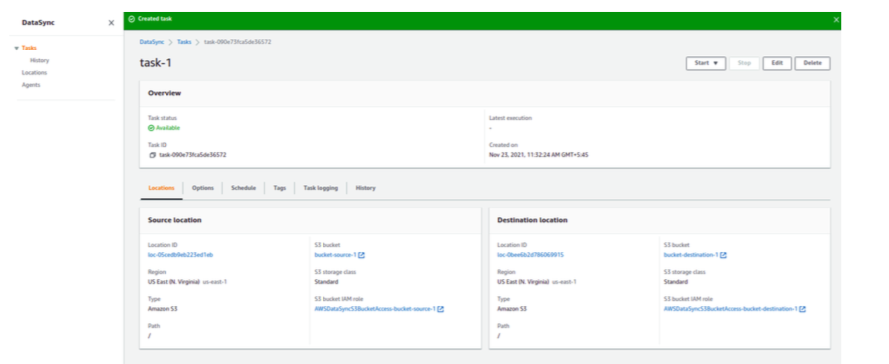
On the top right corner, we can start the transfer with the Start With Default option. Keep an eye on the task status, it must say success. The duration of transfer depends on the content size, you can view the real-time transfer log in the CloudWatch.
Migrate AWS S3 bucket to the different AWS account
Migrating the S3 bucket content from one AWS account to another needs extra steps of configuration. Once you have your source contents and destination bucket ready, we can start the configuration.
Source Account
On the source bucket, go to the Permission tab and under the bucket, policy add the following code.
Things to edit:
- “Principle”: {“AWS”: “<DestinationAccountID>}, (you can find it under Account> Account settings
- “Resource”: YOUR-SOURCE-BUCKET-NAME-HERE/*,
{
    "Version": "2012-10-17",
    "Statement": [
    	{
        	"Sid": "DelegateS3Access",
        	"Effect": "Allow",
        	"Principal": {"AWS": "222222222222"},
        	"Action": ["s3:ListBucket","s3:GetObject"],
        	"Resource": [
            	"arn:aws:s3:::YOUR-SOURCE-BUCKET-NAME-HERE/*",
            	"arn:aws:s3:::YOUR-SOURCE-BUCKET-NAME-HERE"
        	]
    	}
    ]
Destination account
On the destination account, first, we need to create an IAM policy. Navigate to the Policies section on the right column and Create Policy.
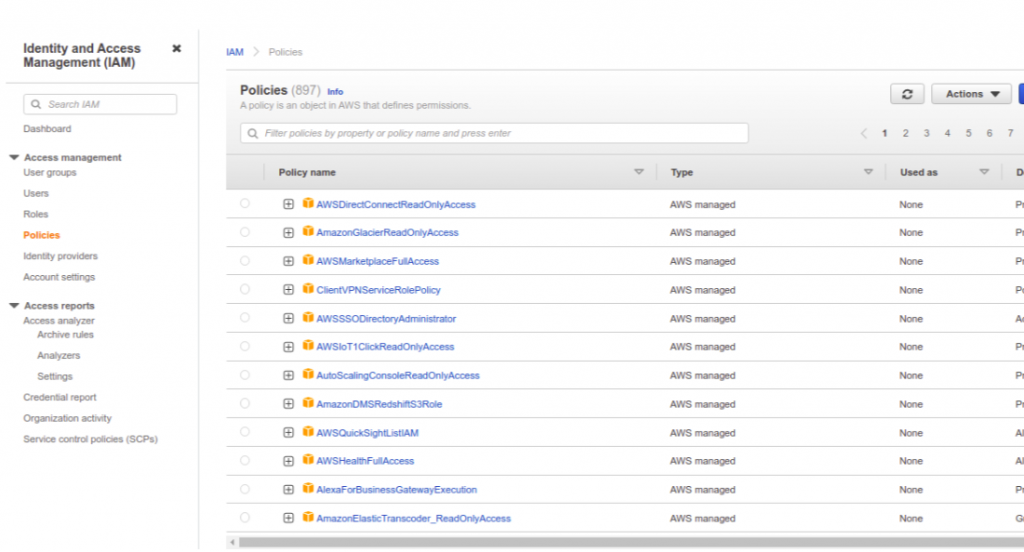
Upon creating a policy, select JSON based to add the policy.
Things to edit:
- YOUR-SOURCE-BUCKET-NAME-HERE
- YOUR-DESTINATION-BUCKET-NAME-HERE
{
    "Version": "2012-10-17",
    "Statement": [
    	{
        	"Effect": "Allow",
        	"Action": [
            	"s3:ListBucket",
            	"s3:GetObject"
        	],
        	"Resource": [
            	"arn:aws:s3:::YOUR-SOURCE-BUCKET-NAME-HERE",
            	"arn:aws:s3:::YOUR-SOURCE-BUCKET-NAME-HERE/*"
        	]
    	},
    	{
        	"Effect": "Allow",
        	"Action": [
            	"s3:ListBucket",
            	"s3:PutObject",
            	"s3:PutObjectAcl"
        	],
        	"Resource": [
            	"arn:aws:s3:::YOUR-DESTINATION-BUCKET-NAME-HERE",
            	"arn:aws:s3:::YOUR-DESTINATION-BUCKET-NAME-HERE/*"
        	]
    	}
    ]
}
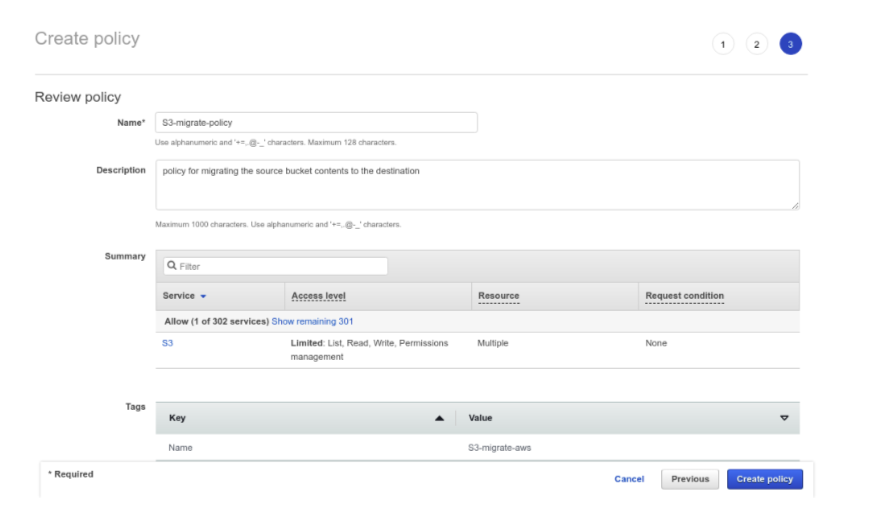
Next, we need to review the policy and provide the name and the description. Let the summary and tags be the default and finally Create Policy. You will receive confirmation of the added policy.
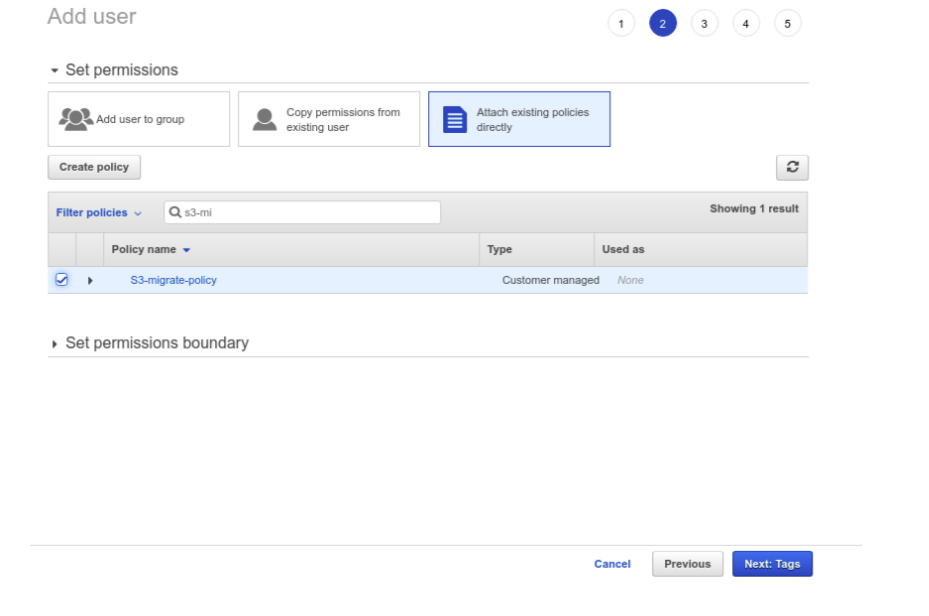
Next, we need to create a user and define the policy role we just created.
Now, we need to configure the AWS account of the destination in our terminal.
aws configure
Here, pass the AWS Access Key ID and Secret Access Key. Also, make sure in the region section, put the region that matches the S3 bucket existing region.
After all, is set, fire the following command in the terminal.
aws s3 sync s3://<<sourceS3Bucket>> s3://<<DestinationS3Bucket>> --source-region <<SourceRegion>> --region <<DestinationRegion>
We can now verify the content migration in our destination S3 bucket.
Contact Cloudlaya for fast and fairly-priced cloud migration services as per your organization’s needs.