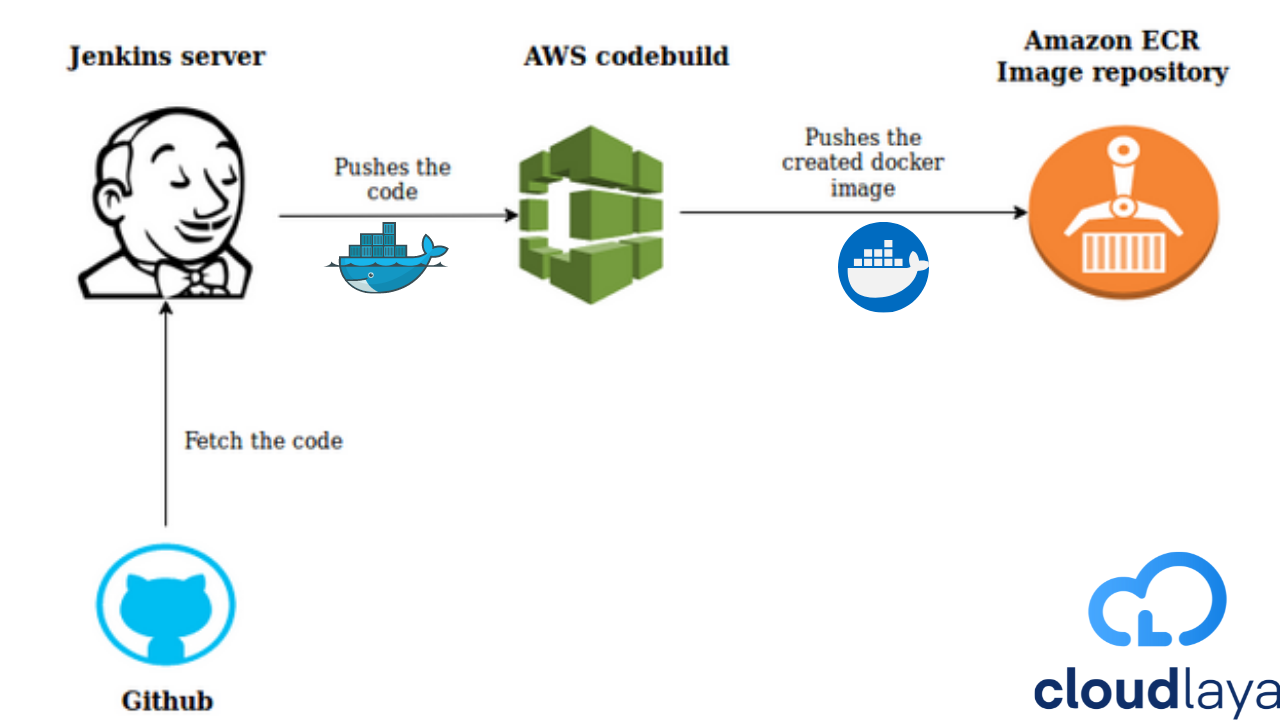
How to Deploy Application on AWS ECR Using Jenkins
Docker is a robust application development and deployment platform. It is a valuable tool for integrating new technologies and streamlines the deployment of programs across many systems. On every machine, a Docker-based application will start up the same way every time. Jenkins is a Java-based open-source Continuous Integration server that automates the Continuous Integration process by coordinating a series of tasks. Jenkins supports the whole software development life cycle, including building, testing, documenting, deploying, and other stages.
A Dockerfile is a script that uses the Docker platform to create containers automatically. It is essentially a text document that contains all of the instructions that a user may use to create an image from the command line.
In this article, you will learn the comprehensive approach to deploying Docker images to AWS using the Jenkins pipeline. Along the way, we will be using tools such as Git, Docker, Jenkins, and the AWS platform.
Table of Contents
Setting up Jenkins
The prominent step while we follow through this tutorial is to set up the whole architecture in VPS. Here we will be deploying the application to AWS thus, Amazon Linux Machine is our sweet spot, to begin with.
Configuring EC2 instance
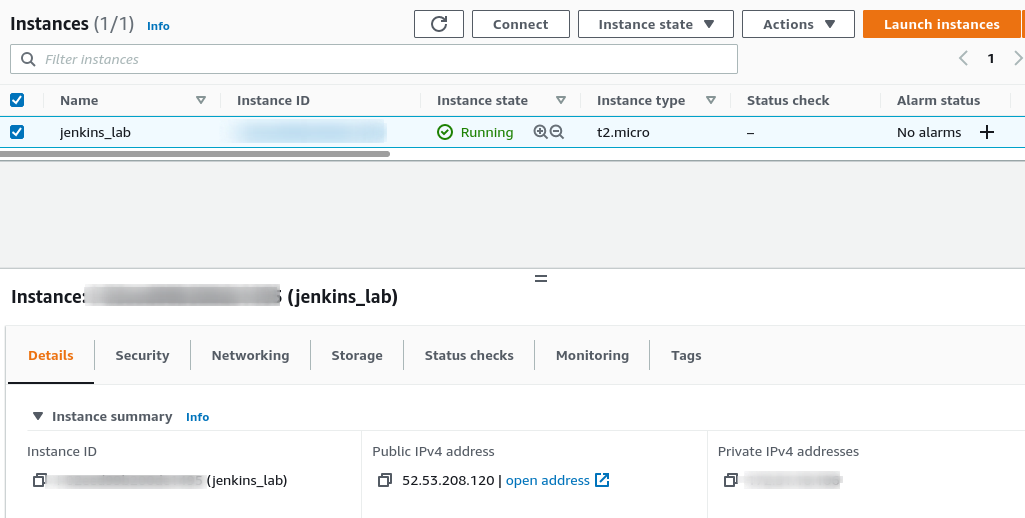
Step 1: Go to the AWS dashboard and then to the EC2 services. Here, create an instance with the available low-tier configuration; our setup should work fine with free-tier architecture.
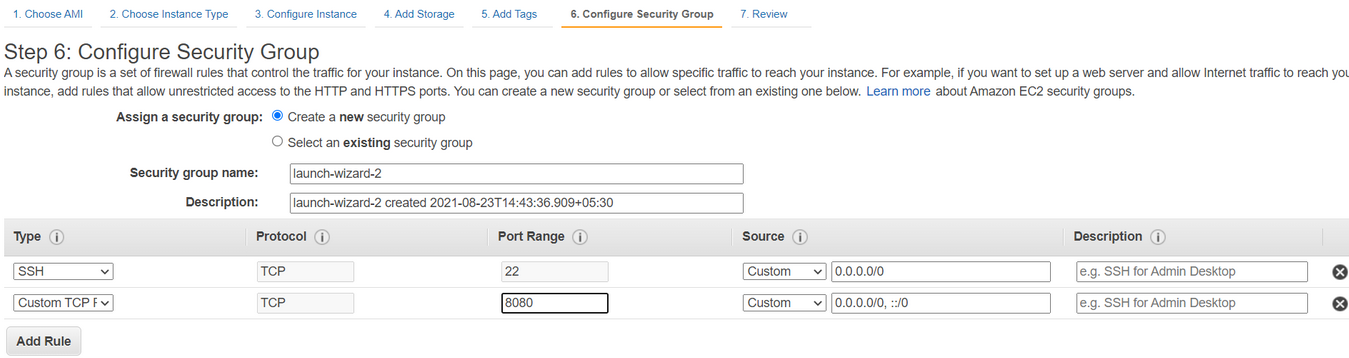
Step 2: On the security group section, add the Custom TCP group with port 8080 and SSH with port 22.
Note: You might want to consider allocating the public IP of the instance with the Elastic IP so that the IP stays reserved and helps with fault tolerance.
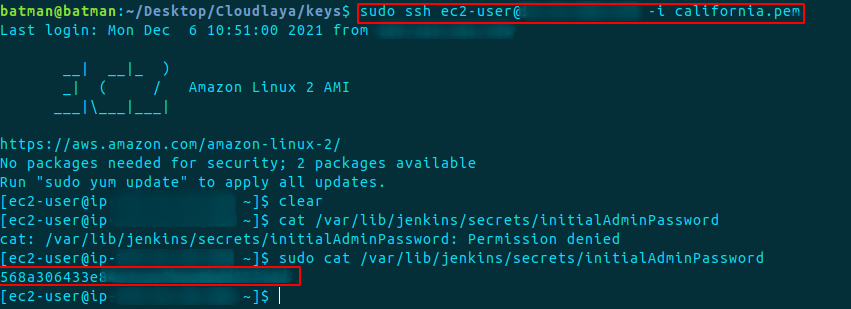
Step 3: Now, let’s SSH to our instance. To do so, fire the command.
sudo ssh ec2-user@<public-IP> -i path/to/.pem key
Installing JAVA
Step 1: After the successful SSH connection, firstly update the Linux machine.
sudo yum install epel-release
sudo yum update
Step 2: Jenkins is built on top of Java thus we need to install Java before installing Jenkins. Use this command to install the latest OpenJDK environment.
sudo yum install java-1.8.0-openjdk.x86_64
Check the installation and Java version with.
java -version
openjdk version "1.8.0_91"

OpenJDK Runtime Environment (build 1.8.0_91-b14)

OpenJDK 64-Bit Server VM (build 25.91-b14, mixed mode
Step 3: In order to set the Jenkins to locate Java Virtual Machine, we need to set the environment path viz: JAVA_HOME and JRE_HOME.
sudo cp /etc/profile /etc/profile_backup
echo 'export JAVA_HOME=/usr/lib/jvm/jre-1.8.0-openjdk' | sudo tee -a /etc/profile
echo 'export JRE_HOME=/usr/lib/jvm/jre' | sudo tee -a /etc/profile
source /etc/profile
Preview the set environment with the following command.
echo $JAVA_HOME
echo $JRE_HOME
Installing Jenkins
Step 1: We are using the YUM package manager to install Jenkins in our VPS. Now, run the following commands accordingly.
amazon-linux-extras install epel -y
sudo wget -O /etc/yum.repos.d/jenkins.repo https://pkg.jenkins.io/redhat-stable/jenkins.repo
sudo rpm --import https://pkg.jenkins.io/redhat-stable/jenkins.io.key
yum install jenkins
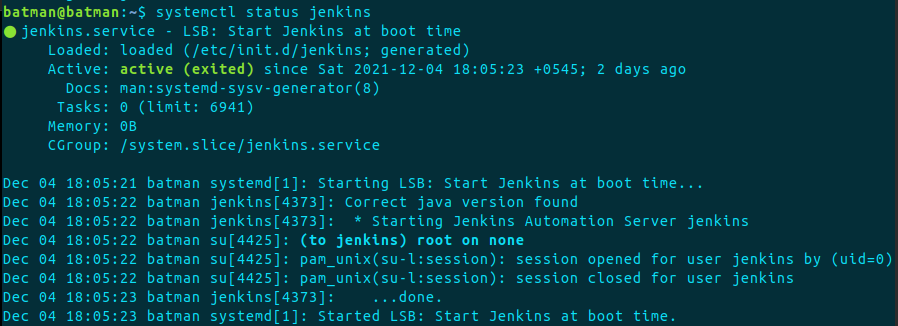
Step 2: Now, start Jenkins service
sudo systemctl start jenkins.service
Step 3: Install git.
sudo yum install git -y
Step 3: Since the service has started, we can now access it through a web browser on port 8080.
http://<public_ip>:8080
Step 4: On the browser, you should see the Jenkins interface that asks for the administrator password.
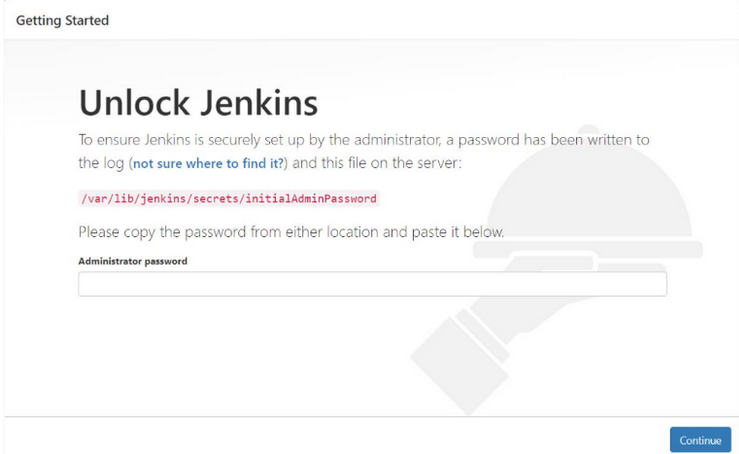
Step 5: Now cat the following Jenkins file to retrieve the Administrator password and paste it to the Jenkins dashboard.
cat /var/lib/jenkins/secrets/initialAdminPassword
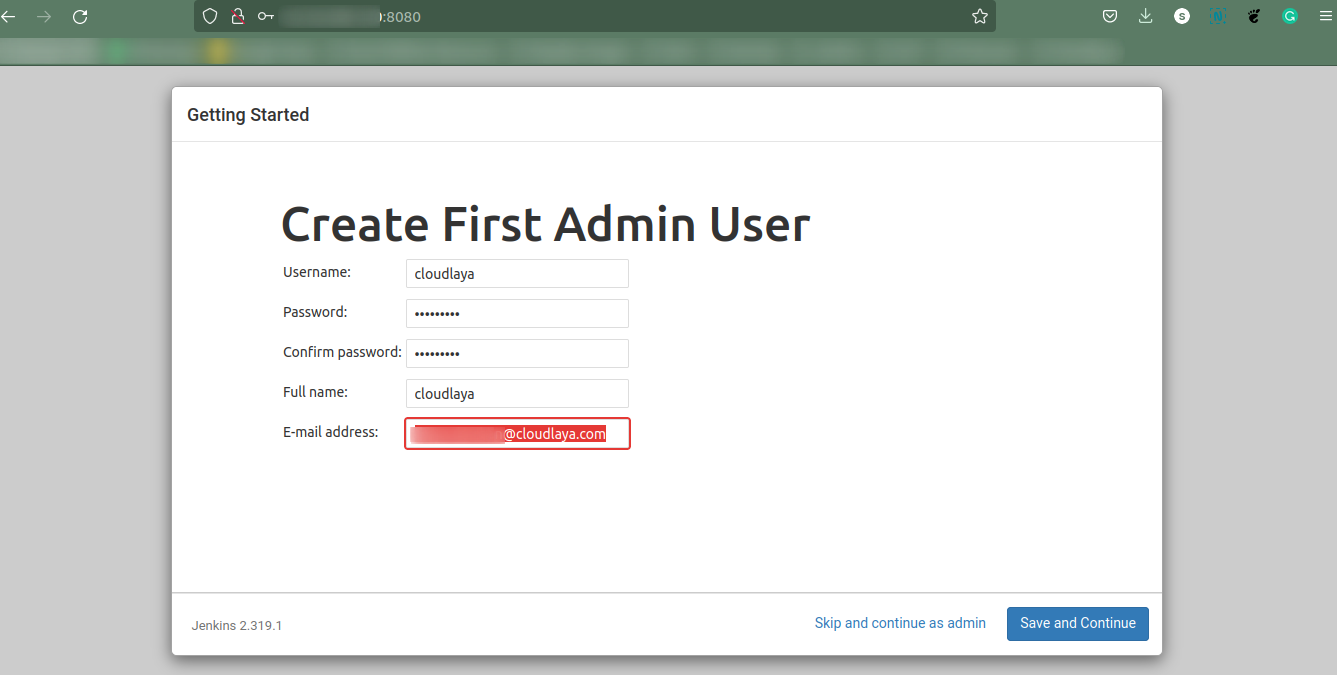
Step 6: Here, create a Jenkins user.
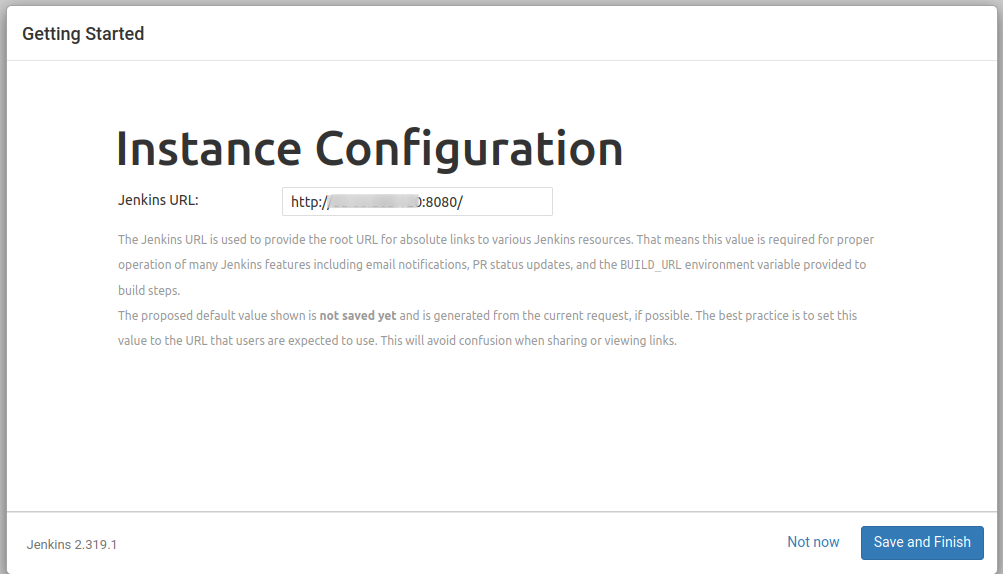
Step 7: On the jenkins Instance configuration, check if the URL is correct and hit “Save and Finish.”
After the configuration is completed, you should see the Jenkins dashboard with an awful lot of services to play around.

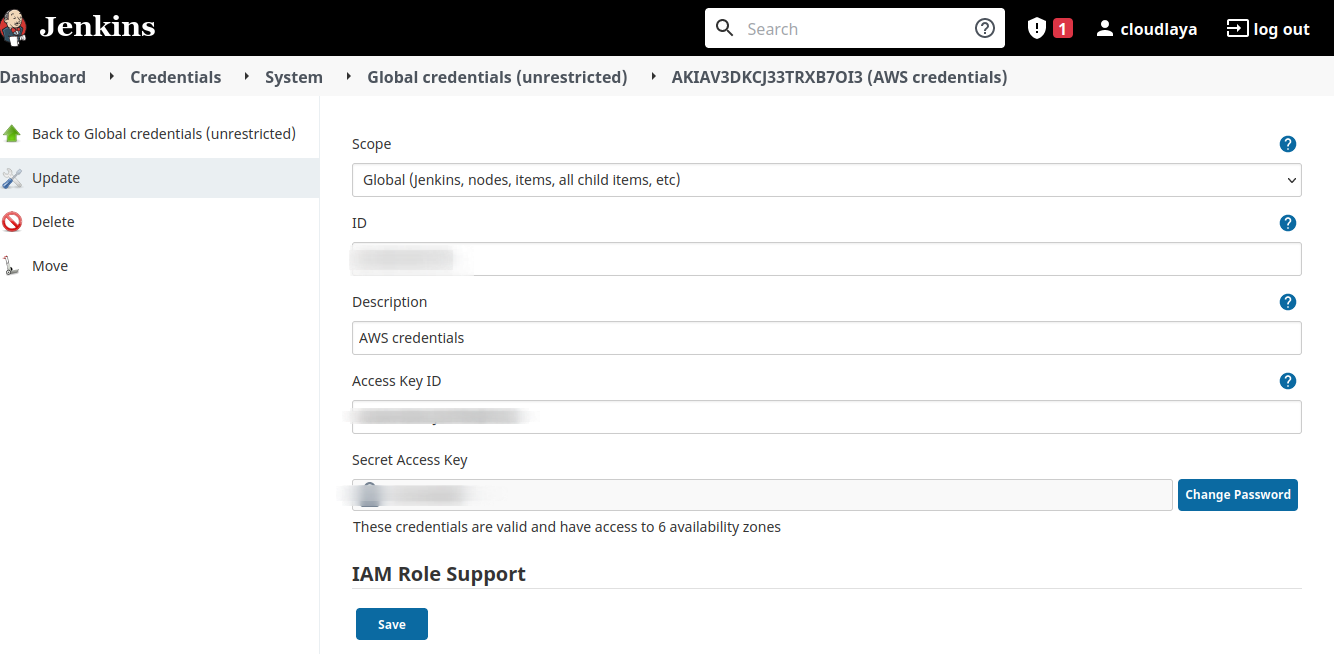
Step 8: We may also set up AWS credentials in Jenkins so that it facilitates the Docker push to the ECR repository.
Note: You may already have the Access Key ID and the Secret Access Key while creating users in an AWS account.
Installing Docker
Step 1: Update your machine for installed packages and caches.
yum update -y
Step 2: Now, install the recent docker engine package with a command.
sudo amazon-linux-extras install docker
Step 3: Once done, you can now start the docker services.
sudo service docker start
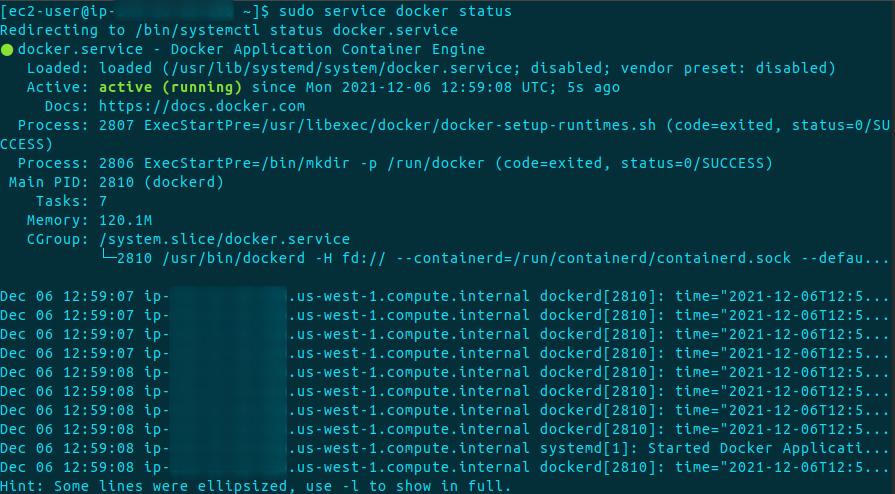
We should see the running status of docker once we fire this command.
sudo service docker status
To mitigate the further wreckage, we need to add ec2-user to the docker group.
sudo usermod -a -G docker ec2-user
Step 4: Finally, after all configured restart both of the Jenkins and Docker servers.
sudo service jenkins restart
sudo service docker restart
Note: If you encounter issues that say, Got permission denied while trying to connect to the Docker daemon socket at unix:///var/run/docker.sock in Amazon Linux AMI, run the following command.
sudo chmod 666 /var/run/docker.sock
Installing plugins in Jenkins
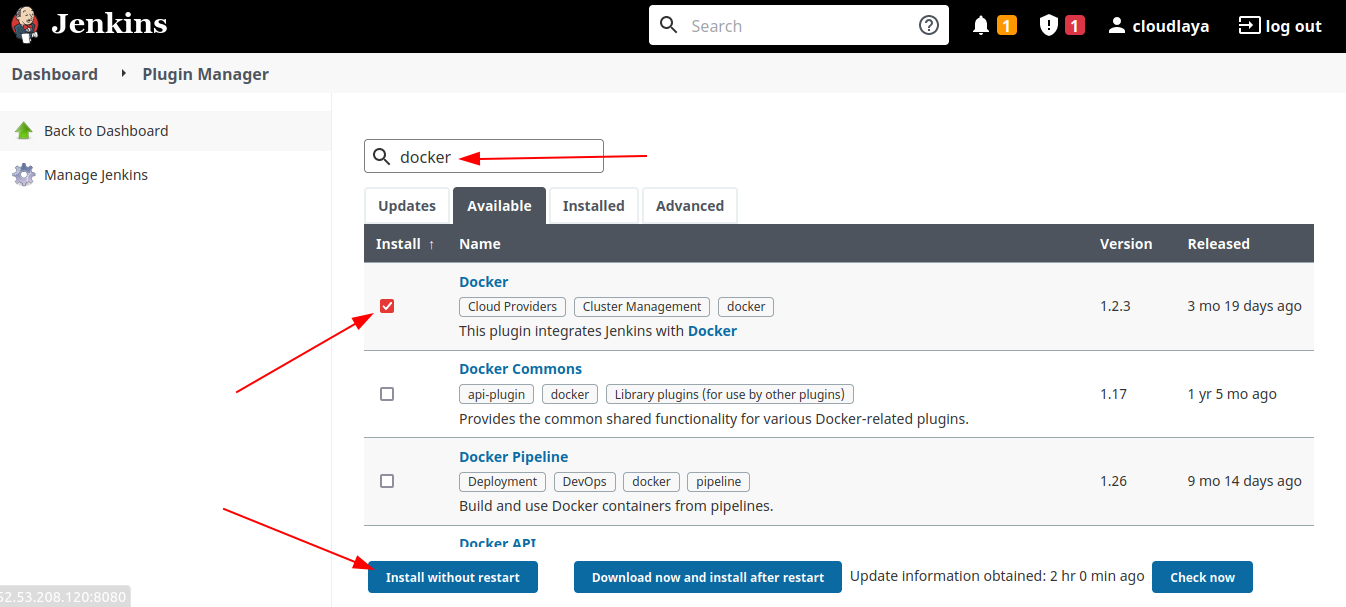
Now we need to install some plugins in our Jenkins service so that the pipeline script we are about to write in the Jenkins job will be set up properly.
Step 1: Go to Jenkins dashboard, and then to Plugin Manager.
Step 2: Here, click on the Available tab and search for the following plugins
- Docker
- Docker Pipeline
- Amazon ECR plugin
Now, after these are selected, click on the Install without restart button.
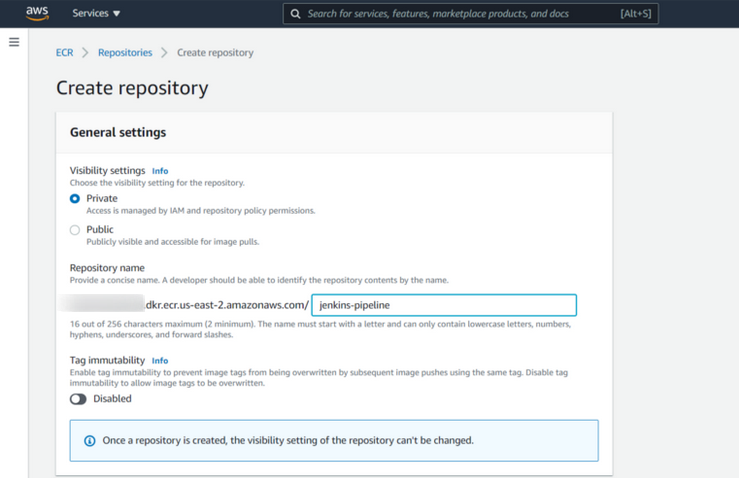
Creating ECR Repository
Now head back to the AWS dashboard and find the ECR services. Here, create a repository (either public or private) and provide the proper repository name.
Next, leave everything here default and finally hit the create repository button.
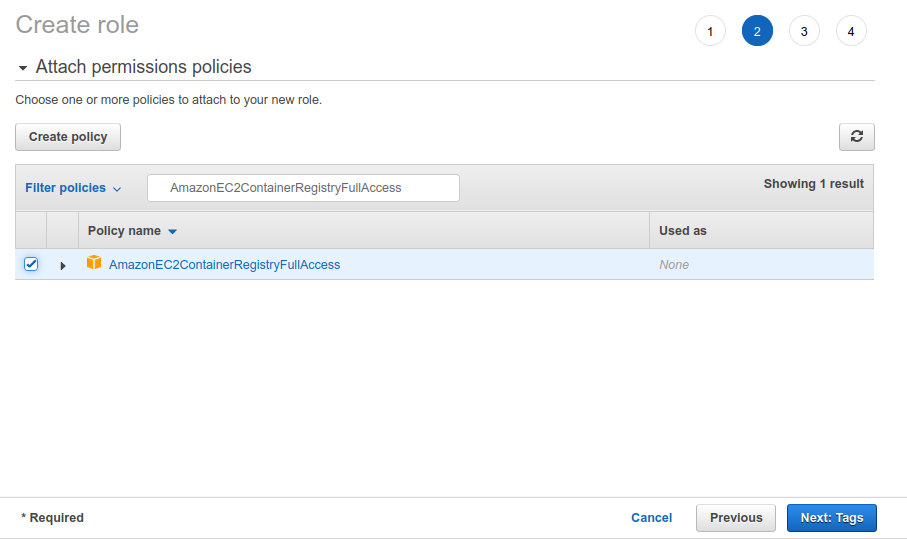
Creating IAM Role
For the sake of our EC2 instance to interact with the ECR repository, we need to create a new role and attach it to the EC2.
Step 1: On the IAM dashboard, create a new role and on the policy attach AmazonEC2ContainerRegistryFullAccess to the role and save it.
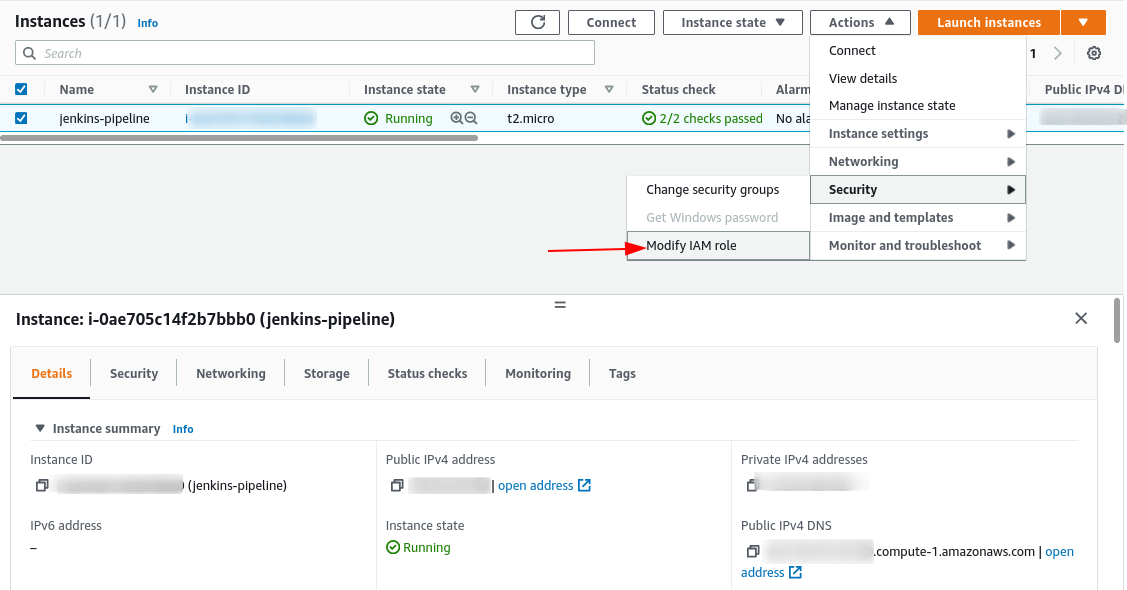
Step 2: Now, go back to the EC2 instance we created earlier, and there select the instance. Here, select Actions > Security > Modify IAM Role as shown in the image below.
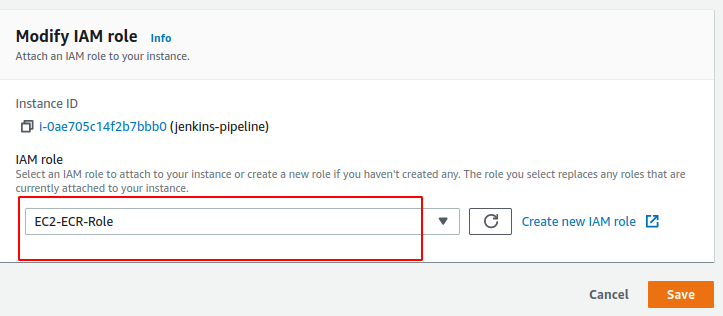
Step 3: Finally, on the IAM role section, find and attach the role we created that provisions ECR with EC2, and hit save.
Creating Jenkins Job
As we have set up all of our requirements, viz: Jenkins, Docker, Git, EC2, and ECR. It’s now a good time to create a new Jenkins Job and provision the Jenkins pipeline code.
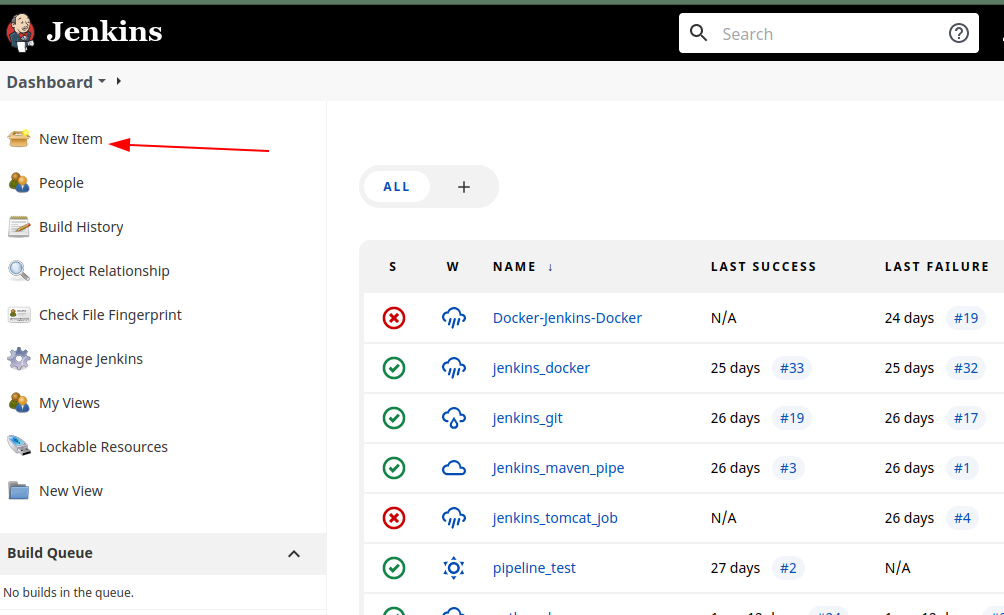
Step 1: Log in to the Jenkins (if not), and from the Jenkins dashboard, create a new item.
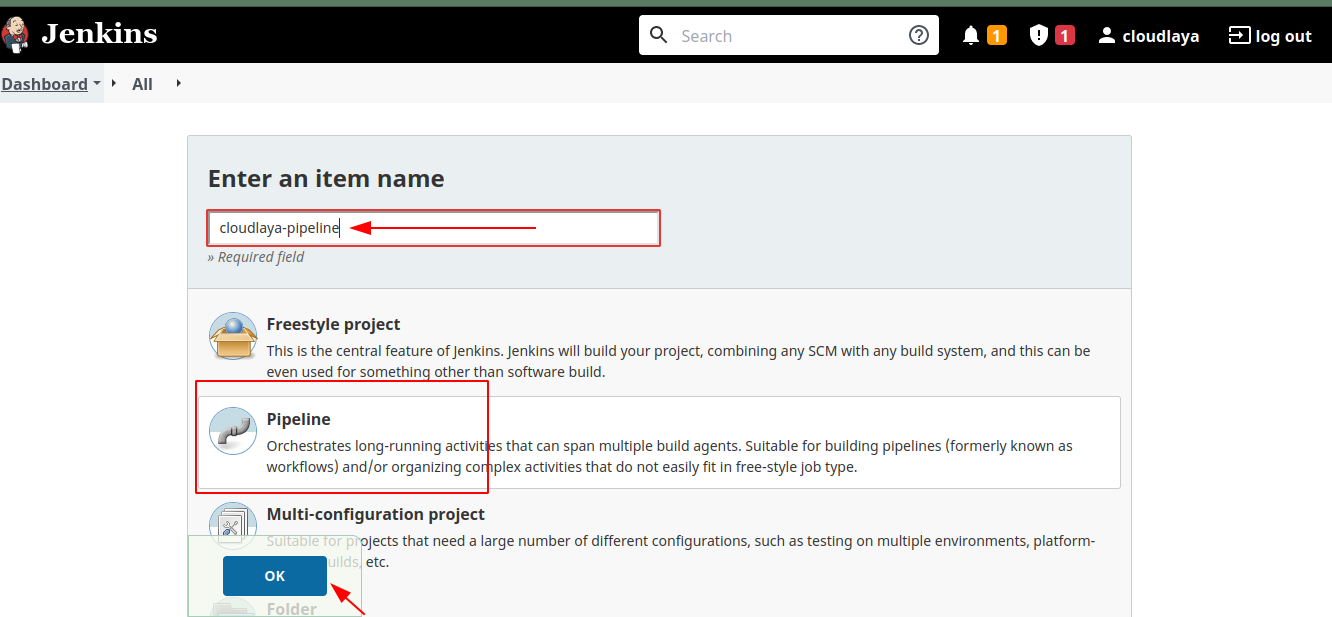
Step 2: Provide an item name. Here we are interested in the Jenkins pipeline project thus mark it and click Ok.
Step 3: Scroll down to the pipeline tab. It’s where we will add our Jenkins job script.
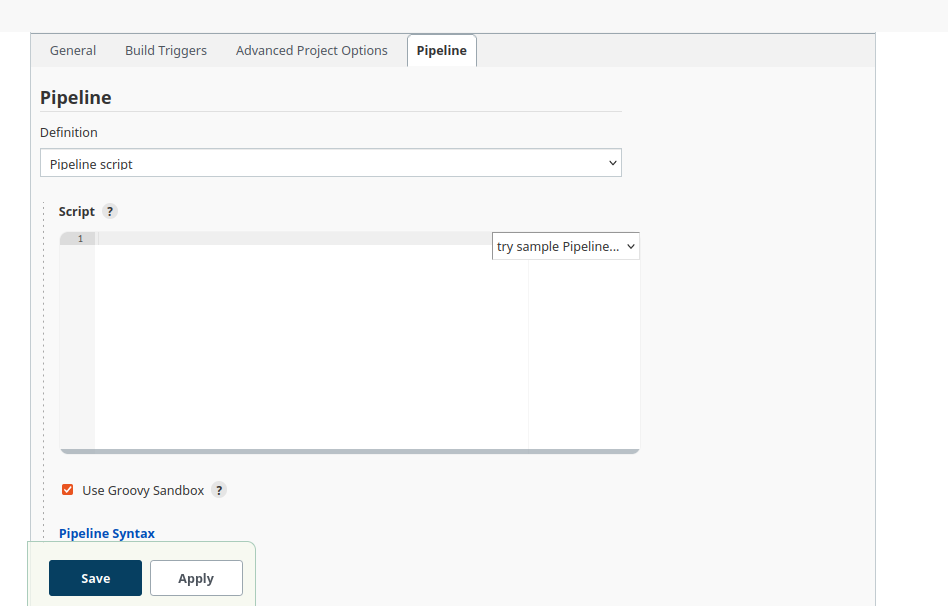
Step 4: Paste the following code in the script section.
Replace, AWS_ACCOUNT_ID, AWS_DEFAULT_REGION, IMAGE_REPO_NAME, IMAGE_TAG, REPOSITORY_URI.
pipeline {
    agent any
    environment {
        AWS_ACCOUNT_ID="222222222222"
        AWS_DEFAULT_REGION="us-east-1"
        IMAGE_REPO_NAME="jenkins-pipeline"
        IMAGE_TAG="v1"
        REPOSITORY_URI = "22222222222.dkr.ecr.us-east-1.amazonaws.com/jenkins-pipeline"
    }

    stages {

         stage('Logging into AWS ECR') {
            steps {
                script {
                sh """aws ecr get-login-password --region ${AWS_DEFAULT_REGION} | docker login --username AWS --password-stdin ${AWS_ACCOUNT_ID}.dkr.ecr.${AWS_DEFAULT_REGION}.amazonaws.com"""
                }

            }
        }

        stage('Cloning Git') {
            steps {
                checkout([$class: 'GitSCM', branches: [[name: '*/master']], doGenerateSubmoduleConfigurations: false, extensions: [], submoduleCfg: [], userRemoteConfigs: [[credentialsId: '', url: 'https://github.com/sd031/aws_codebuild_codedeploy_nodeJs_demo.git']]])
            }
        }

    // Building Docker images
    stage('Building image') {
      steps{
        script {
          dockerImage = docker.build "${IMAGE_REPO_NAME}:${IMAGE_TAG}"
        }
      }
    }

    // Uploading Docker images into AWS ECR
    stage('Pushing to ECR') {
     steps{
         script {
                sh """docker tag ${IMAGE_REPO_NAME}:${IMAGE_TAG} ${REPOSITORY_URI}:$IMAGE_TAG"""
                sh """docker push ${AWS_ACCOUNT_ID}.dkr.ecr.${AWS_DEFAULT_REGION}.amazonaws.com/${IMAGE_REPO_NAME}:${IMAGE_TAG}"""
         }
        }
      }
    }
}
Step 5: Once the script runs, on the Jenkins job console output, you should see the tick mark.
Scroll down to view the whole log of how our application is being pulled, built, deployed, and pushed to ECR.
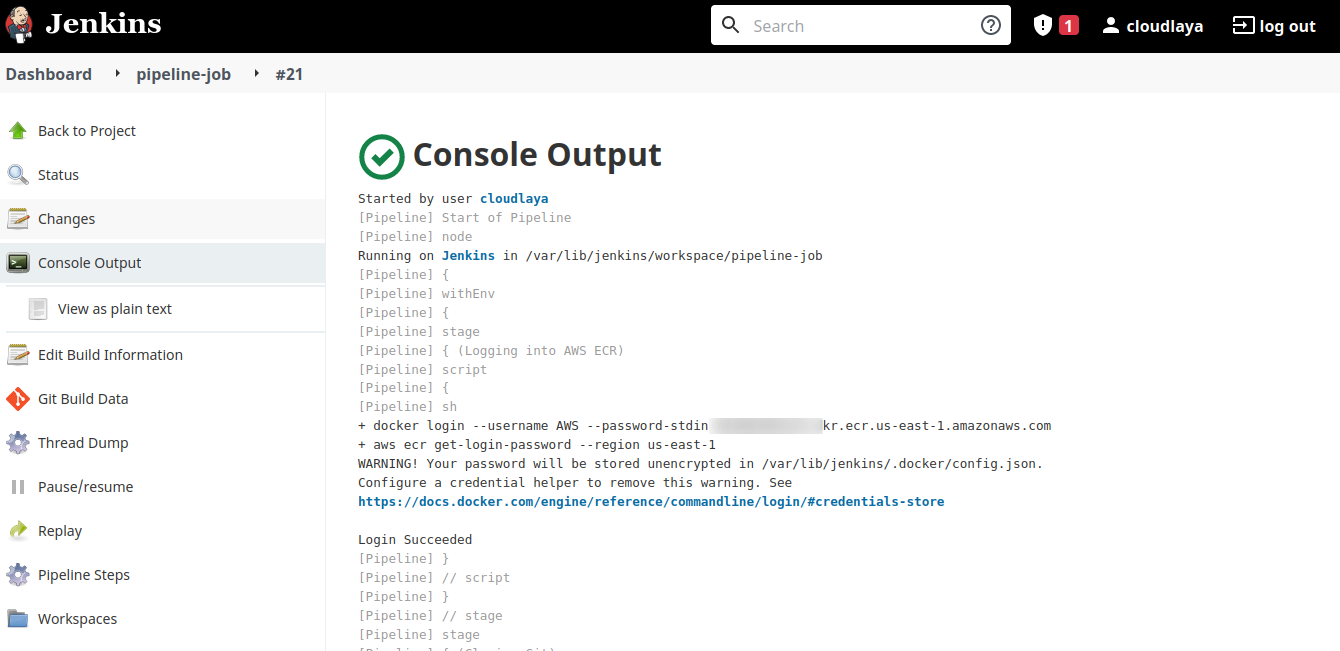
We can further verify the docker image being pushed successfully to the ECR with image tag v1.

Conclusion
Now you should have full insight to deploy a Docker image to AWS ECR using Jenkins. There can be various complex undertakings while deploying projects of large scale to cloud platforms. We, here at Cloudlaya are well-trained professionals providing cloud services and solutions to abundant customers. We practice the best CI/CD architecture to deploy the application, and with cost-saving approaches. Contact Cloudlaya today to get a quote.

As a seasoned DevSecOps Consultant, I specialize in ensuring the reliability, scalability, and security of cloud infrastructure and applications that are crucial for my clients’ success.