Connect to your VPS With An SSH Client & FTP Client
Linux and Mac OS come bundled with SSH clients by default, in the case of windows use third-party clients like Putty. In order to log in to your server, follow the steps below:
Step 1: When you request a VPS server from our website, you will receive a mail with your server’s access details.
step 2: Save the key file to a safe place and DO NOT give this key file to unauthorized people as they can connect to your server using this key only.
step 3: Then you will be prompted to a screen that will give you information about your server. Ip address, access keys.
What you do next depends on your local device, if you are running a Linux-based OS then follow these steps. If you are using windows OS then skip step 6.
Step 4: Open a new terminal on your local system.
Step 6: First locate your key file directory and set the permissions for your private key file (.pem) to 600 using a command like the one below.
Chmod 400 keyfile.pem
Step 5: Connect to the server using the following command:
Ssh -i keyfile ubuntu@server-ip
Remember to replace KEYFILE in the previous commands with the path to your private key file (.pem), SERVER-IP with the public IP address, or hostname of your server with the username of your server. eg: ubuntu, centos, bitnami, etc
SSH clients might ask you to confirm the server’s host key and add it to the cache before connecting. Accept this request by typing or selecting “Yes”

Steps 6:In the case of windows, you will be required to have a third-party ssh client application ( we recommend Putty). When you install putty, another application called PuTTYgen will also be downloaded which will be necessary for us. In the case of windows, we will need to convert the .pem key to the .ppk key file. First, we will talk about how we can convert the .pem key to the .ppk key file.
Converting .pem key to .ppk key for VPS connection
Step I. Open the PuTTYgen application.
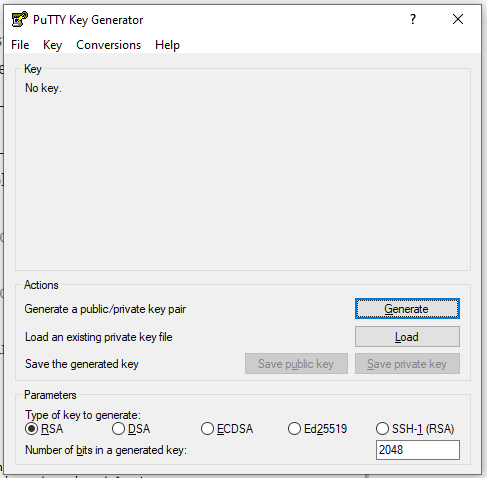
Step II: Click on load, then locate and select the .pem key file you stored.
Step III: After you select your .pem file then the application will import the key file and then click on save the private key to your desired location.
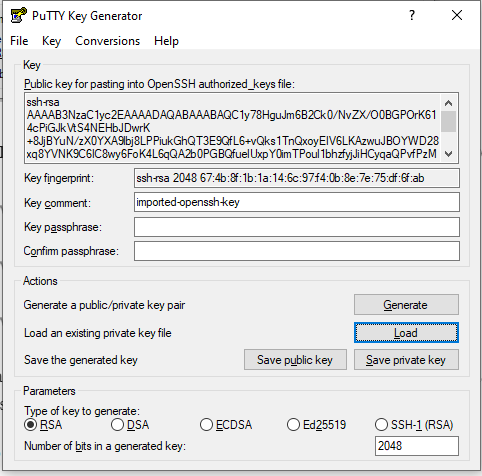
Step IV: You have successfully converted your .pem key file to a .ppk key file. you can also convert the .ppk key file to a .pem key file.
Now we have the required .ppk key file, we continue to learn how to connect to VPS through ssh.
Step 7: Open Putty application, in hostname add username@yourserverIP
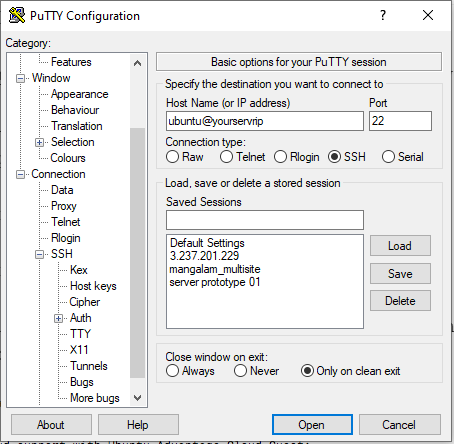
Step 8:In the category section of PuTTY, browse to connection> ssh>auth. Then locate and select your .ppk key file.
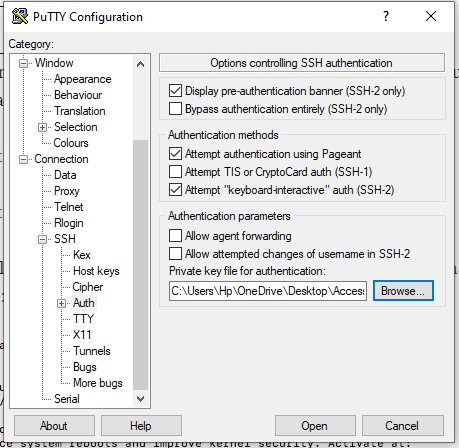
Step 9: Click on open, then you will be prompted with a warning. click on yes then you will be connected to your server without a password.
Although SSH is more secure than password authentication you should be aware that no authorized person can get hold of the private key. Contact us if you want to connect to your server using a password instead of using a key.
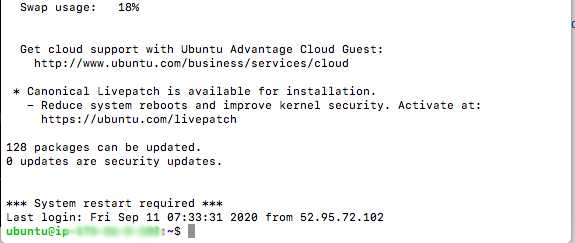
You should now be logged into your server. Here is an example of what you’ll see:
Connect AWS lightsail With FTP Client
Step 1: Open FTP client ( eg Filezilla /Cyberduck ) on your local system.
Step 2: Here I am connecting using Filezilla. Open Filezilla and click on “site manager” in the file tab.
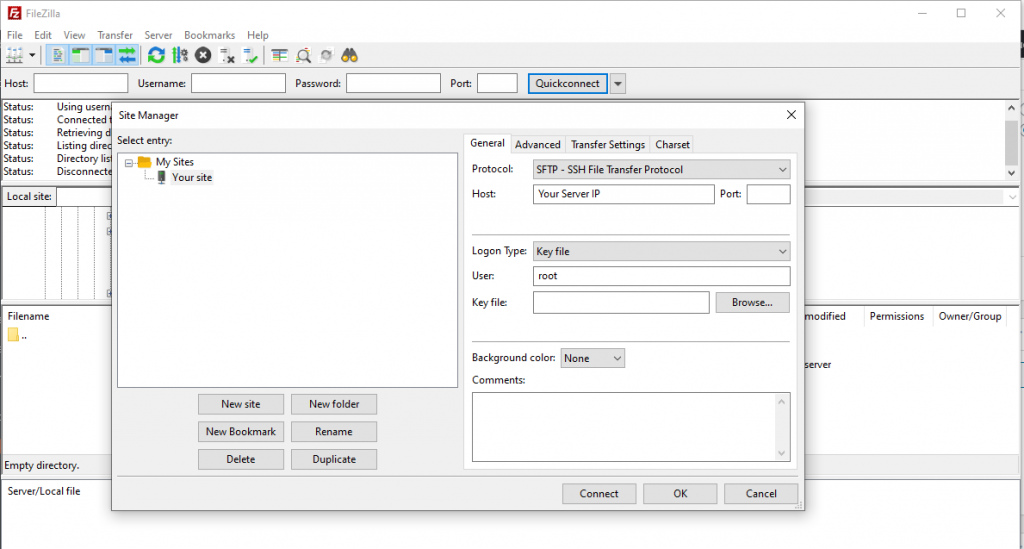
Select the protocol SFTP, or FTP if you have set up an FTP account in your server. Fill the host with your server’s IP address and leave the port tab empty if you haven’t manually changed the FTP port number. In Logon type, choose the key file method if you haven’t changed the default login process of your server. If you are using the password authentication method choose “ask for password”.
In the user field, fill in with your username in the server ( usually root, ubuntu, bitnami, etc.). For users with the password authentication method click on connect and type in the server password when it requires, whereas for the key file users, browse to the location of your private key in your local device in the “key file” tab. Then click on connect to access your server.
Step 3: FTP clients might ask you to confirm the unknown fingerprint. Accept this request by typing or selecting “ALLOW”.
You should now be logged into your server. Here is an example of what you’ll see:
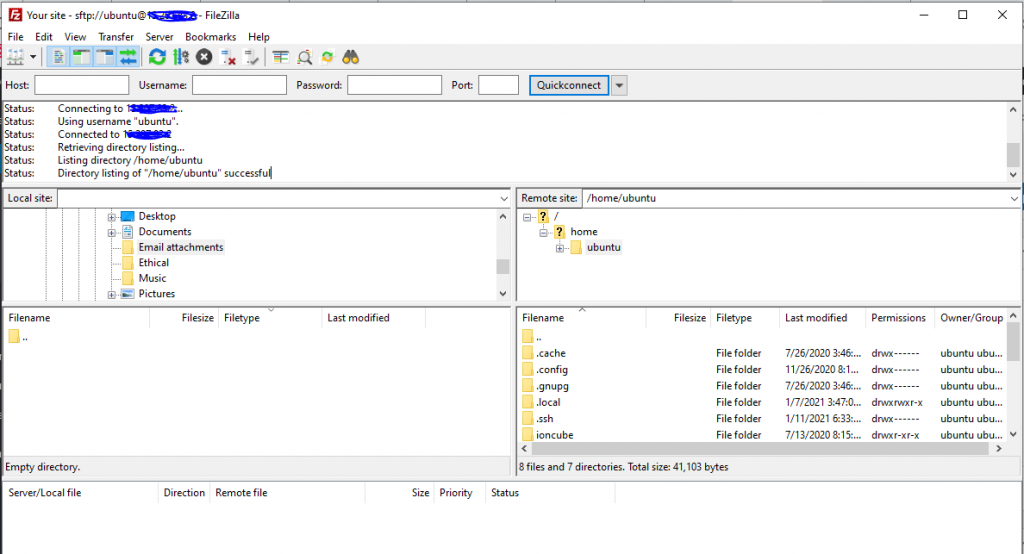
Step 4: You can reach the application root directory by browsing to /var/www. Browse to your desired folder on your server and upload files from your local machine.
There you go, you have successfully learned how to connect to your VPS server using SSH and FTP clients.
If there is anything you like to know more about then please contact us at 01-5224498 or you can email us at [email protected].